How to Load 35mm Film: The Complete Step-by-Step Guide
Quick Summary
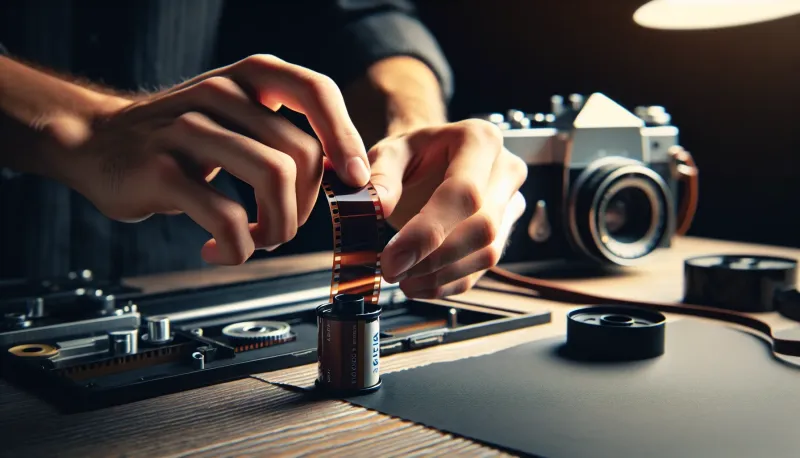
Open the camera back, insert the film canister on the left, pull the leader across to the take-up spool on the right, make sure sprocket holes engage the teeth, close the back, advance two frames, and watch the rewind knob rotate when you advance. In our experience at Kubus Photo Service, we see 5-10% of rolls come back blank because the film never actually advanced. The rewind knob test takes 2 seconds and prevents this heartbreak entirely.
- Load in shade or indoors to prevent fogging the first few frames
- Both rows of sprocket holes must engage the teeth for proper advance
- Watch the rewind knob rotate as proof the film is actually moving
- Advance past the leader (2 frames minimum) before shooting your first photo
- If the rewind knob doesn't spin when you advance, the film isn't loaded - start over
- Practice with an expired roll before loading fresh film in an unfamiliar camera
Insert the film canister on the left side, pull the leader to the take-up spool on the right, engage both rows of sprocket holes with the teeth, close the back, advance while watching the rewind knob rotate. If that knob doesn't turn when you advance, the film isn't loaded correctly and you need to start over.
We see it every week at Kubus Photo Service: a roll comes back completely blank because the film never actually advanced. The photographer thought they shot 36 frames. The camera counter showed 36 frames. But the film sat in the canister the entire time because it never properly engaged the take-up spool. Over the years, we've processed thousands of rolls and estimate that 5-10% of completely blank rolls we receive are due to loading failures, not camera malfunctions.
This guide prevents that disappointment. We'll walk through loading every type of 35mm camera, explain the verification steps that confirm success, and troubleshoot common problems.
Before You Start
Preparation prevents problems. Get these things right before opening your camera back.
Find Shade
Direct sunlight fogs film. The leader sticking out of the canister has already been exposed to light, but strong sun during loading can fog additional film inside the canister.
Step into shade. Move indoors. Duck under an awning. Find a shadow. Loading takes thirty seconds; finding better light takes ten. Why risk ruining your first few frames?
Confirm the Camera is Empty
Opening a camera with film inside ruins whatever's been shot. Before pulling the release:
-
Check the frame counter. If it shows anything other than "0," "E," or "S," there might be film loaded
-
Turn the rewind knob gently clockwise. If you feel resistance, film is probably inside
-
Look through the back if your camera has a small window. Some cameras have a clear port showing film presence
Inspect Your Film
Remove the film from its box and plastic canister. Examine it:
-
The leader (the tongue of film sticking out) should be clean and flat. Bent, crinkled, or torn leaders cause loading problems
-
The canister should be undamaged. Dents can affect how smoothly film unspools
-
Note the ISO speed. You'll need this to set your camera or verify DX coding
Opening the Camera Back
Different cameras use different mechanisms. Here are the common types.
Camera Back Opening Methods
Pull-Up Rewind Knob (How It Works: Pull straight up on rewind knob until back pops open) — Common Cameras: Canon AE-1, Pentax K1000, Minolta X-700, Nikon FM/FE
Back Release Button (How It Works: Press button/slider on left side of body) — Common Cameras: Some Nikon bodies, certain Olympus models
Sliding Latch (How It Works: Push latch while pulling back open) — Common Cameras: Olympus Stylus, most point-and-shoots
Bottom Plate Removal (How It Works: Remove bottom plate first, then open back) — Common Cameras: Leica III, Canon rangefinders, Zorki/FED
Pull-Up Rewind Knob (Most Common)
The majority of 35mm SLRs open by pulling straight up on the rewind knob. The crank unfolds as you pull, and the back pops open, usually hinged on the right side.
Back Release Button or Lever
Some cameras have a separate release mechanism, usually a small button, slider, or lever on the left side of the camera body.
Sliding Latch (Point-and-Shoots)
Compact cameras typically have a sliding latch on the side or bottom. Push the latch while pulling the back open.
Bottom Plate Removal (Older Rangefinders)
Vintage rangefinders often require removing a bottom plate before the back will open. Usually a threaded ring or catch releases the plate. A common mistake with these cameras is trying to force the back open without first removing the bottom plate.
Understanding the Film Chamber
With the back open, familiarize yourself with what you're looking at.
Left Side: Film Canister Chamber
The left cavity holds your film canister. A spindle in the chamber engages with the spool inside the canister, connecting it to the rewind mechanism.
The canister always goes on the left in 35mm cameras. The flat end with the protruding hub points downward.
Center: Film Gate and Sprocket Drum
The rectangular opening in the center is the film gate. This is where light exposes the film during each shot. The gate measures exactly 24mm x 36mm on standard 35mm cameras.
The toothed drum (sprocket) sits next to the gate. Its teeth engage with the perforations along the film edges. The sprocket ensures precise film advancement of exactly one frame between exposures.
Right Side: Take-Up Spool
The take-up spool winds film as you shoot. Empty at the start, it gradually fills with exposed film throughout the roll.
The spool has slots, teeth, or a textured surface to grip the film leader. Different cameras use different attachment methods.
Step-by-Step Loading: SLR Cameras
This process applies to most manual-wind 35mm SLRs. Have you loaded a camera before? Even experienced photographers benefit from reviewing proper technique.
Step 1: Insert the Canister
Hold the canister with the flat end (the side with the protruding hub) pointing down. Lower it into the left chamber until it seats firmly.
Push the rewind knob back down. It should engage with the canister hub. Rotate it slightly to confirm connection. You should feel the canister turning inside the chamber.
Step 2: Pull the Leader Across
Grasp the film leader and draw it across the camera body to the right side. Pull out enough film to reach past the take-up spool, about 4-6 inches.
Let the film lie flat across the film gate. The emulsion side (usually duller, more matte) should face the lens. The shiny side faces the back.
Step 3: Insert Leader into Take-Up Spool
Most take-up spools have slots that accept the film leader. Insert the leader tip into a slot, angling it slightly so it catches.
Some cameras have multiple slots at different positions around the spool. Others have a single slot.
A few cameras use prongs or teeth instead of slots. These grip the leader without requiring insertion.
Step 4: Engage the Sprocket Holes
This step causes most loading failures. Do it carefully.
Look at the sprocket drum. It has teeth designed to fit into the perforations along both edges of the film strip.
Gently press the film down so both rows of perforations (top and bottom edges of the film) seat onto the sprocket teeth. The film should lie flat, with teeth visibly through the perforations.
Hold the film in place with one finger while you advance the camera one frame with your other hand. The take-up spool should start winding film. Watch to confirm the leader moves.
Step 5: Verify Before Closing
Advance one more frame while the back is still open. Watch everything:
- Does the take-up spool continue winding?
- Do the sprocket teeth stay engaged with the perforations?
- Does the film lie flat without bunching or curling?
If anything looks wrong, pull out more leader and try again.
Step 6: Close the Back
Once film is properly engaged, close the back firmly until it clicks or latches.
Step 7: Advance Past the Leader
The exposed leader has been fogged by light. You need to advance past it before shooting.
Advance and fire twice. This moves fresh, unexposed film into the gate.
As you advance, watch the rewind knob. It should rotate counterclockwise (the opposite of the rewind direction). This rotation proves film is being pulled from the canister.
Step 8: Confirm Everything Works
After advancing past the leader:
- Frame counter should show "1" or "2" depending on your camera
- Rewind knob should have rotated with each advance
- Advance lever should feel consistent tension
- No unusual sounds or resistance
If the rewind knob never moved, the film is not advancing. Open the back and reload.
Mail-In Your Film From Anywhere
Ship your film to our Brooklyn lab and get professional scans delivered to your inbox. Free shipping on 4+ rolls.
Step-by-Step Loading: Point-and-Shoot Cameras
Automatic cameras simplify the process but still require correct initial positioning.
Step 1: Open the Back
Use whatever mechanism your camera has (usually a sliding latch) to open the film compartment.
Step 2: Insert the Canister
Place the canister in the left chamber, flat end down. It should drop in easily.
Step 3: Position the Leader
Pull the leader across to the orange, red, or marked line on the right side. Most automatic cameras have a visual indicator showing where the leader should reach.
You don't need to insert it anywhere. Just position the tip at the marked location.
Step 4: Close the Back
Snap the back shut. The camera should automatically:
- Engage the film
- Advance to frame 1
- Set ISO from the DX code (if applicable)
- Display ready status
Listen for the motor advancing film. Watch the frame counter reach "1." Some cameras display film icons or LED confirmations.
Step 5: Verify Success
If the camera shows "1" and seems ready to shoot, loading succeeded.
If it shows "E" or "0" or rewinds immediately, something went wrong. Open the back and try again, making sure the leader reaches the marked position.
Verification: The Rewind Knob Test
This is the single most important check. Learn it. Use it every time. We've seen thousands of blank rolls that could have been avoided with this simple test.
When you advance film through the camera, the take-up spool pulls film from the canister. This rotation transmits back through the film to the canister spool, which rotates the rewind mechanism.
Watch the rewind knob as you advance. It should turn counterclockwise (opposite from the direction you'd turn it to rewind).
If it turns: Film is advancing correctly. Proceed with confidence.
If it doesn't turn: Film is not advancing. The leader either slipped off the take-up spool or never engaged properly. Open the back immediately and reload before shooting anything.
Some cameras have small windows or indicators showing film motion. Use these too, but the rewind knob test works on virtually every camera.
What Causes Loading Failures
Understanding failure modes helps you avoid them. In our experience processing film since 1994, we've seen these patterns repeatedly.
Leader Slipping Off Take-Up Spool
The most common failure. You think the leader is attached, but it slips free during the first few advances. The camera continues "advancing" but no film moves.
Prevention: Push the leader firmly into the take-up slot. Advance one frame with the back open and confirm the spool is actually winding film before closing.
Sprocket Teeth Not Engaging
Film lies across the gate but isn't seated on the sprocket teeth. Advancing the camera moves the take-up spool without pulling film from the canister.
Prevention: Press the film down firmly over the sprocket drum. Visually confirm teeth are through the perforations.
Insufficient Leader Length
Not pulling enough leader means there's not enough film to reach the take-up spool or engage both rows of sprocket holes.
Prevention: Pull out 4-6 inches of leader. More is fine; the camera will advance past whatever's exposed.
Dirty or Worn Take-Up Spool
Old cameras may have worn take-up spools that don't grip film securely. Smooth plastic or worn slots let the leader slip.
Prevention: Fold or bend the leader tip slightly to create more grip surface. Consider having the camera serviced if this happens consistently.
DX Coding Issues (Automatic Cameras)
Some auto-load cameras read the DX code to confirm film presence. Damaged or missing DX patterns can confuse the camera.
Prevention: Check that the metallic DX pattern on your film canister is clean and undamaged.
Camera-Specific Notes
Canon AE-1 and AE-1 Program
The take-up spool has multiple slots. Insert the leader into any slot, advance once with the back open, and confirm it's winding before closing.
Pentax K1000
Straightforward loading with a standard take-up spool. The mechanical simplicity means fewer potential issues but also no electronic verification.
Nikon FM/FE Series
Similar to Canon. Some later models have take-up spools with prongs that grip the sprocket holes rather than requiring the leader to insert into a slot.
Leica M Series
Bottom-loading design requires removing the baseplate. The take-up spool accepts the leader more precisely. Take extra care with sprocket engagement.
Olympus OM Series
Standard loading procedure, but the smaller body means slightly tighter clearances. Work deliberately.
Automatic Point-and-Shoots
Most handle loading automatically once the leader reaches the marked position. Trust but verify: confirm the frame counter advances and the ready indicator shows.
Unloading: The Other Half
Removing film properly matters as much as loading it.
When to Rewind
Rewind when:
- The frame counter reaches the end (36, 24, or 12)
- The advance lever won't move and you feel firm resistance
- You need to change film mid-roll (note the frame count)
How to Rewind (Manual Cameras)
Press the rewind release button (usually on the camera bottom). This disengages the sprocket so film can travel backward.
Flip out the rewind crank and turn clockwise. You'll feel resistance as film winds back into the canister.
When resistance suddenly disappears, the leader has pulled off the take-up spool. Most photographers continue rewinding until the leader pulls fully into the canister to prevent accidental reuse.
Some photographers stop early, leaving the leader out. This makes reloading partial rolls easier but requires marking to prevent confusion.
Confirming Complete Rewind
Before opening the back:
- Turn the rewind crank. It should spin freely with no resistance
- The frame counter should show "S" or "0" or the start position
Open the back and remove the canister. Consider labeling it immediately with content and date.
Automatic Cameras
Most point-and-shoots rewind automatically when the roll ends. Listen for the motor, wait until it stops, then open the back.
Some cameras fully retract the leader. Others leave it partially out. Know your camera's behavior.
Troubleshooting Common Issues
Film Tears During Loading
You pulled too hard, the leader was damaged, or the sprocket teeth caught the film edge instead of the perforations.
Solution: Carefully trim a new leader from the undamaged film. Work in subdued light since some film is now exposed.
Film Wound Backward
You accidentally turned the rewind knob while loading, pulling film back into the canister.
Solution: The leader may have retracted completely. Use a film leader retriever ( online) to fish it back out, or accept that the roll needs to be opened in darkness.
Camera Shows Error After Loading
Automatic cameras may reject film with damaged DX codes, incorrectly positioned leaders, or low batteries.
Solution: Clean DX contacts, reload with fresh technique, check battery level.
Rewind Knob Never Turns But Counter Advances
This is bad. It means the camera's counting mechanism works but film isn't actually moving.
Solution: Open immediately. Reload carefully. Something failed at the take-up spool or sprocket engagement.
Mid-Roll Back Opened Accidentally
Light has exposed several frames around the film gate.
Solution: Close immediately. Advance two frames to move past the exposed section. Frames on either side of the exposed area may have partial fogging. The rest of the roll should be fine.
Loading Verification Checklist
Use this checklist every time you load film:
- [ ] Confirmed camera is empty before opening
- [ ] Loaded in shade or indoors
- [ ] Canister seated fully in left chamber
- [ ] Leader inserted into take-up spool
- [ ] Both rows of sprocket holes engaged
- [ ] Verified winding with back open
- [ ] Back closed and latched
- [ ] Advanced 2 frames past leader
- [ ] Rewind knob rotated during advance
- [ ] Frame counter shows "1" or "2"
Practice Makes Automatic
Loading feels awkward at first but becomes unconscious with practice. Consider practicing with an expired roll before committing fresh film.
The key is developing habits:
- Always check the rewind knob
- Always advance past the leader
- Always work in shade
- Always verify before closing
These habits prevent the frustrating experience of receiving blank rolls from the lab.
What Happens at the Lab
When your successfully loaded roll arrives at Kubus Photo Service, we extract the film in complete darkness using specialized equipment. Whether your leader is in or out doesn't matter; we can handle both.
During development, any loading issues become apparent. Blank rolls from loading failures, light leaks from opened backs, partial exposures from slipped leaders. We note these problems and can often help troubleshoot what went wrong.
Our standard turnaround runs 4-6 business days depending on volume, with rush same-day and next-day service when you need results faster. However your film arrives, we'll process it carefully and return high-resolution scans you can trust.
Frequently Asked Questions
What if I forgot to check the rewind knob?
Check it now, even mid-roll. Advance one frame and watch. If it turns, you're fine. If not, you've been shooting on the same frame repeatedly. Open the back, assess the damage, and reload properly.
Can I load film in a dark room?
Yes, but it's unnecessary for 35mm. The leader is pre-exposed anyway. Loading in shade provides enough light to see what you're doing while preventing additional fogging. Full darkness is only required if you've accidentally exposed film or are loading sheet film holders.
How many frames do I need to advance past the leader?
Two frames is standard and sufficient. Some photographers advance three for extra safety. More than that wastes film.
What if my leader got pulled into the canister?
Buy a film leader retriever. These inexpensive tools (around ) fish the leader back out without opening the canister. They're worth owning if you shoot film regularly.
Can I open the camera back mid-roll?
You'll lose several frames to light exposure. If you need to switch film mid-roll, note the frame count, rewind with the leader out, reload later, and advance past where you stopped. Some frames will be lost to overlap or light exposure.
My point-and-shoot keeps rewinding immediately after loading. What's wrong?
The camera isn't detecting the film properly. Common causes: leader not reaching the marked position, dirty DX contacts, weak batteries. Clean the contacts, replace batteries, and reload with the leader clearly at the marked line.
Does it matter which direction the emulsion faces?
Yes, but film is designed so you can't get it wrong. The canister only fits one way, which positions the emulsion correctly. The emulsion (light-sensitive) side faces the lens; the backing side faces the pressure plate.
Successfully loaded film still needs professional processing to become images. Kubus Photo Service has developed and scanned film in Brooklyn since 1994. Visit our film developing and scanning page to learn about our services, or start your mail order at our mail-in film lab. We're also available at (718) 389-1339 with any questions.
Related Articles
Best Film Cameras for Beginners: An Honest 2026 Buying Guide
Choosing your first film camera matters more than any other gear decision. This guide covers the camera types, specific models worth buying, common pitfalls to avoid, and how to test a camera before committing.
First Roll of Film Mistakes: What Went Wrong and How to Fix It
Your first roll came back and something's wrong. Blank frames, light leaks, blur, weird colors. This diagnostic guide identifies the most common first-roll problems, explains what caused them, and tells you how to avoid them next time.
What ISO Film Should I Use? The Complete Guide to Film Speed Selection
Choosing the right ISO film speed affects everything from grain structure to shooting flexibility. This guide breaks down when to use ISO 100, 200, 400, 800, and beyond, with real-world scenarios and technical explanations.
Ready to Develop Your Film?
We're a family-run film lab in Greenpoint, Brooklyn, developing film since 1994. Whether you drop off in store or mail your rolls from anywhere in the US, we treat every frame with care.
How to Mail In Film for Developing: Complete Step-by-Step Guide
Learn exactly how to safely mail your film for professional developing. Step-by-step guide covering packing, shipping options, what to expect, and how to get the best results from a professional film lab.
Read the Complete Guide