Push Processing Film: The Complete Technical Guide to Pushing and Pulling
Quick Summary
Push processing extends development time to compensate for underexposing film—you shoot at a higher ISO than rated, then tell your lab to push-develop to recover shadow detail. In our experience processing thousands of pushed rolls since 1994, black-and-white film handles pushing significantly better than color negative, with Tri-X and HP5+ tolerating 2-3 stops easily while maintaining usable shadow detail. Pushing increases contrast by 25-40% per stop and grain visibility, while reducing shadow detail recovery.
- Push 1 stop: shoot ISO 400 film at 800, develop 25-30% longer
- Push 2 stops: shoot ISO 400 film at 1600, develop 50-60% longer
- Push 3 stops: shoot ISO 400 at 3200, develop 80-100% longer (B&W only recommended)
- B&W pushes cleanly; C-41 color negative gets contrast but color shifts occur
- Always mark your film canister AND order form with the push amount
- Pull processing reduces development time 15-20% per stop for lower contrast
- Kubus includes C-41 push processing up to +2 stops at no extra charge
Push processing lets you shoot ISO 400 film at 1600 or higher by extending development time to compensate for underexposure. It's one of those techniques that separates photographers who merely shoot film from those who truly understand it. When the light fails, when you're stuck indoors without a flash, when the venue bans tripods, pushing film is often the difference between capturing the moment and going home empty-handed.
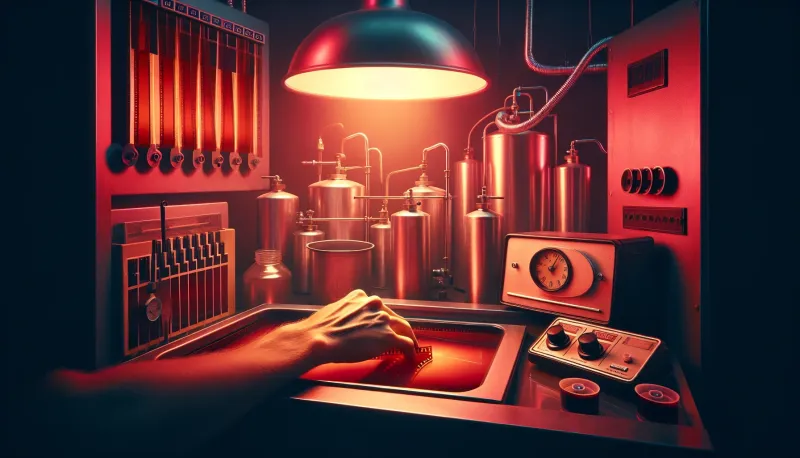
We've been processing push requests at Kubus Photo Service since we opened in 1994, and over three decades, we've seen every combination of film stock, push amount, and shooting scenario imaginable. This guide distills what actually works, what the chemistry is doing, and how to communicate with your lab to get predictable results.
What Push Processing Actually Does
Let's start with the fundamentals, because there's a persistent misconception that pushing film somehow increases its sensitivity. It doesn't. The film captured exactly the amount of light that hit it during exposure. Pushing happens entirely in development.
When you underexpose film by shooting it at a higher ISO than rated, your shadows receive less light than the emulsion was designed for. The highlights, being brighter, still receive adequate exposure. Without intervention, you'd end up with printable highlights but murky, underexposed shadows.
What actually happens during push processing? The developer continues working longer, pulling more silver (in B&W) or more dye (in color) from the underexposed shadow areas. The problem is that development doesn't affect all tones equally. Highlights develop faster than shadows because they received more exposure. When you extend development to bring up shadows, you're also developing the highlights further, which increases overall contrast by approximately 25-40% per stop pushed.
This is the fundamental tradeoff of pushing: you're trading shadow detail and smooth tonal gradations for the ability to shoot in lower light. Understanding this tradeoff helps you decide when pushing is the right choice and how much is too much.
The Chemistry Behind Push Processing
Black and White Development
In conventional B&W development, silver halide crystals that received light are converted to metallic silver. The amount of silver deposited correlates with the amount of light received. Development begins at the surface of the emulsion and works inward.
Extending development time allows the developer to work deeper into the emulsion and to convert more marginally exposed silver halide crystals. The reality is that this recovery has limits. If a crystal received zero photons, no amount of development will convert it. There's a floor below which no detail exists.
The increased contrast comes from the fact that heavily exposed areas (highlights) continue developing and building density while you're waiting for the shadows to catch up. At some point, highlight density becomes unprintable or unscannable, setting a practical limit on how far you can push.
C-41 Color Negative Development
Color negative development is more complex because you're creating dye images in three separate layers (cyan, magenta, yellow) rather than a single silver image. Each layer has slightly different sensitivity and development characteristics.
When you push C-41, you're extending the color developer time from the standard 3:15 to approximately 4:00-4:15 for one stop, or 5:00-5:30 for two stops. This affects all three layers, but not equally. The result is often a color shift in addition to increased contrast. In our experience, most C-41 films pushed one stop show a slight shift toward warmer tones (approximately 5-10% on the yellow/orange axis). At two stops, some films develop a greenish cast in the shadows.
C-41 films are also more prone to increased grain when pushed because the dye clouds that form around developed silver crystals become larger and more irregular with extended development. This is different from the tight, well-defined grain of pushed B&W film.
E-6 Slide Film Development
Pushing E-6 slide film is possible and was common in the days of photojournalism deadlines. The process is similar conceptually but more critical in execution because slide film has less exposure latitude than negative film.
Pushed slides show increased contrast and saturation, with shadows going to pure black faster than in negative film. The results can be striking for certain subjects but unforgiving for scenes with wide dynamic range.
How Much Can You Push Different Films?
Over the years, we've processed thousands of pushed rolls. Here's what we recommend based on real-world results:
Black and White Films
Kodak Tri-X 400 (Box Speed: 400) — 1-Stop Push: Excellent, 2-Stop Push: Very Good, 3-Stop Push: Usable, Notes: King of push processing
Ilford HP5 Plus (Box Speed: 400) — 1-Stop Push: Excellent, 2-Stop Push: Very Good, 3-Stop Push: Usable, Notes: Slightly finer grain than Tri-X
Ilford Delta 3200 (Box Speed: 1000*) — 2-Stop Push: Native, 3-Stop Push: Good at 6400, Notes: *Actually ISO 1000, designed for push
Kodak T-Max 400 (Box Speed: 400) — 1-Stop Push: Good, 2-Stop Push: Fair, 3-Stop Push: Not recommended, Notes: T-grain blocks shadows faster
Kodak T-Max P3200 Box Speed: 800-1000* — 2-Stop Push: Native, 3-Stop Push: Usable at 6400, Notes: *Designed for push processing Kodak Tri-X 400: The king of push processing. Tri-X was practically designed for this. You can push it to 1600 and get usable shadow detail with a distinctive high-contrast look. Push to 3200 and you're in grainy, contrasty territory that works for certain subjects, particularly street photography and concerts. We've processed Tri-X pushed to 6400 that, while extremely grainy, had a gritty aesthetic that suited the subject matter.
Ilford HP5 Plus 400: Almost as pushable as Tri-X but with a slightly different grain structure. HP5+ pushed to 1600 has slightly finer grain than Tri-X but marginally less shadow detail recovery. At 3200, the two are equivalent. HP5+ is an excellent choice if you want the flexibility to push but with slightly smoother midtones.
Ilford Delta 3200: Despite being rated at 3200, Delta 3200 is actually an ISO 1000 film designed to be pushed. Shot at 3200, it's essentially always pushed one-and-a-half stops. You can push it to 6400 or even 12800 for extreme low-light work, though grain becomes very pronounced.
Kodak T-Max 400: T-Max films use tabular grain technology ("T-grain") that produces finer grain at box speed but doesn't respond as well to pushing as traditional cubic-grain films. Pushed T-Max tends to block up in the shadows faster than Tri-X. We recommend against pushing T-Max more than one stop.
Color Negative Films (C-41)
Kodak Portra 800 (Box Speed: 800) — 1-Stop Push: Excellent, 2-Stop Push: Good, Notes: Best high-speed for pushing
Kodak Portra 400 (Box Speed: 400) — 1-Stop Push: Very Good, 2-Stop Push: Fair, Notes: Some color shift at +2
Cinestill 800T (Box Speed: 800) — 1-Stop Push: Good, 2-Stop Push: Fair, Notes: Halation more pronounced
Fuji Superia 400 (Box Speed: 400) — 1-Stop Push: Good, 2-Stop Push: Not recommended, Notes: Greenish shadows at +2 Kodak Portra 800: The best high-speed color negative film for pushing. Portra 800 can be pushed to 1600 with minimal color shift and acceptable grain. At 3200, you'll see increased grain and some color shift, but results are usable. Beyond that, you're in experimental territory.
Kodak Portra 400: Can be pushed to 800 with almost no visible penalty. At 1600, you'll see noticeable contrast increase and some color shift. We generally don't recommend pushing Portra 400 past 1600.
Mail-In Your Film From Anywhere
Ship your film to our Brooklyn lab and get professional scans delivered to your inbox. Free shipping on 4+ rolls.
When Pushing Makes Sense
Have you ever been in a situation where the light just wasn't enough? Here's when pushing becomes your best tool:
Low Light Without Flash
The classic use case. You're shooting indoors, in a club, at a dimly lit event. Flash would either be intrusive, forbidden, or kill the ambient atmosphere. Pushing lets you shoot handheld in conditions that would otherwise require a tripod or faster glass.
A typical scenario: you're shooting a concert with ISO 400 film and a 50mm f/1.8 lens. The venue lighting requires 1/60 at f/1.8 for proper exposure at ISO 1600. Without pushing, you'd be four stops underexposed. With a two-stop push, you shoot at ISO 1600 and the lab compensates in development.
Action in Moderate Light
Sometimes you have enough light to shoot at box speed, but you need faster shutter speeds to freeze motion. Pushing lets you trade the film's latitude for shutter speed. This is common in sports photography, particularly indoor sports where lighting is adequate but not abundant.
Consistency Across Varying Conditions
If you're shooting in conditions where light varies throughout the session, such as moving from outdoor to indoor spaces during an event, pushing gives you a consistent ISO to meter for. Shoot the entire roll at 1600, even if some frames are in better light, and push-develop the whole roll. The well-exposed frames will handle the extra development.
Creative High-Contrast Look
Some photographers push specifically for the aesthetic, not because they need the extra stops. Pushed Tri-X has a distinctive look that's been used in documentary and street photography for decades. If that's the look you want, there's no reason to avoid it.
When Pushing Doesn't Make Sense
A common mistake we see is photographers pushing when they shouldn't. Here's when to avoid it:
High Dynamic Range Scenes
If your scene already has bright highlights and deep shadows, pushing will make the problem worse. The highlights will blow out while the shadows remain underexposed. You're better off shooting at box speed and accepting some motion blur, or using fill flash.
When You Need Smooth Tones
Portraiture, fashion, and product photography typically require smooth tonal gradations. Pushing introduces contrast and grain that work against these goals. If you're shooting portraits in low light, consider a tripod and longer exposure instead of pushing.
When Shadow Detail Matters
Pushing sacrifices shadow detail. If the subject of your image is in the shadows, pushing won't save it. You'll get an image, but the shadows will be murky and noisy. Better to add light or use a genuinely faster film.
Pull Processing: The Opposite Approach
Pull processing is less discussed but equally useful. When you pull film, you overexpose it (shoot at a lower ISO than rated) and then reduce development time to compensate.
Why would you do this? Two main reasons:
- Reduced Contrast (15-25% per stop pulled): If you're shooting in harsh midday sun with deep shadows and bright highlights, pulling reduces the contrast of the negative, making it easier to print or scan with detail in both shadows and highlights.
- Finer Grain: Overexposure fills in the shadow areas of the negative with more silver, and reduced development prevents overdevelopment of highlights. The result is a denser negative with finer apparent grain.
Pulling one stop is common and effective. Pulling more than one stop can result in flat, muddy negatives that are difficult to work with.
How to Request Push Processing
Communication with your lab is essential. Ambiguous or missing instructions lead to disappointment.
Mark Your Film Canister
Before you remove the film from your camera, write on the canister with a permanent marker. Something like "PUSH +2" or "ISO 1600" (for 400-speed film). This is your insurance in case the paperwork gets separated from the film.
Specify on Your Order
When submitting film to any lab, including our mail-in film lab, clearly indicate the push amount. We need to know:
- What the film is rated at (ISO 400)
- What you shot it at (ISO 1600)
- Or simply the push amount (+2 stops)
If you shot different parts of the roll at different ISOs, we can't accommodate that. Push processing is a whole-roll adjustment. Once the film is in the developer, it all gets the same treatment.
Be Specific About Pull Processing
Pull processing is less common, so labs may need clearer instructions. Specify "PULL -1" or "overexposed at ISO 200, develop for ISO 200" to make your intent clear.
Development Time Adjustments
For photographers who develop at home, here are approximate push adjustments for common developers. These are starting points; you'll need to calibrate for your specific setup.
D-76 / ID-11 (1:1 dilution)
- Box speed: approximately 9.5 minutes at 68°F (20°C)
- Push +1: add 25-30% (approximately 12 minutes)
- Push +2: add 50-60% (approximately 15 minutes)
- Push +3: add 80-100% (approximately 17-19 minutes)
Kodak XTOL (1:1 dilution)
- Box speed: approximately 8 minutes at 68°F (20°C)
- Push +1: add 25% (approximately 10 minutes)
- Push +2: add 50% (approximately 12 minutes)
Ilford DD-X (1:4 dilution)
- Box speed: approximately 10 minutes at 68°F (20°C)
- Push +1: add 25% (approximately 12.5 minutes)
- Push +2: add 50% (approximately 15 minutes)
Rodinal / R09 (1:50 dilution)
Rodinal is a compensating developer that naturally holds back highlights while continuing to develop shadows. It's excellent for push processing because the increased contrast is less severe than with other developers.
- Box speed: approximately 13 minutes at 68°F (20°C)
- Push +1: add 20% (approximately 15-16 minutes)
- Push +2: add 40% (approximately 18-19 minutes)
C-41 Push Processing
C-41 is a standardized process, but push processing is accomplished by extending the first developer (color developer) time:
- Standard: 3:15 at 100.4°F (38°C)
- Push +1: color developer time increased to approximately 4:00-4:15
- Push +2: color developer time increased to approximately 5:00-5:30
Blix time remains constant. Temperature control is critical in C-41 push processing; even a half-degree deviation can affect results.
Metering for Push Processing
How you meter when planning to push affects your results significantly. What's the best approach?
Incident Metering
Incident metering (measuring light falling on the subject rather than reflected from it) is the most reliable method when pushing. Set your meter to the ISO you're shooting at (1600 if you're pushing ISO 400 two stops), take a reading, and follow it. The incident meter doesn't care about subject reflectance, so you'll get consistent underexposure that the push development will compensate for.
Reflective Metering
If you're using your camera's built-in meter, remember that it's calibrated to middle gray (18% reflectance). Dark subjects will be overexposed, and bright subjects will be underexposed relative to middle gray.
When pushing, err on the side of slight overexposure rather than additional underexposure. The push development will bring up your shadows, but if you underexpose beyond the push amount, you'll have no shadow detail to recover.
Zone System Considerations
For photographers familiar with the Zone System, push processing is effectively "N+" development. A two-stop push is equivalent to N+2 development, which increases contrast by compressing the shadow zones while expanding the highlight zones.
If you're placing shadows on Zone III expecting them to print as dark-but-detailed, push processing will drop them to Zone II or below. Compensate by placing shadows higher than you normally would.
Practical Scenarios and Recommendations
Concert Photography
Load Tri-X or HP5+ and shoot at ISO 1600. Request a two-stop push. This gives you approximately 1/125 at f/2.8 under typical stage lighting, enough to freeze moderate motion while maintaining depth of field. For darker venues, push to 3200 and accept the grain.
Street Photography at Night
Tri-X pushed to 1600 is the classic look. Shoot with a 35mm or 50mm lens at f/2 or f/2.8, shutter speed around 1/60 to 1/125. The increased contrast suits urban night scenes with their mix of artificial light and deep shadows.
Indoor Events Without Flash
Portra 800 pushed to 1600 is an excellent choice for receptions, parties, and indoor gatherings where you want color. The grain remains acceptable, and the color rendition stays pleasing. For black and white, HP5+ at 1600 is elegant and versatile.
Sports Under Stadium Lights
Stadium lights are often brighter than indoor event lighting but require fast shutter speeds (1/500 or faster) to freeze action. Tri-X at 1600 with fast glass (f/2.8 or faster) works well. For color, Portra 800 pushed to 1600 handles artificial lighting reasonably well.
Lab Processing at Kubus Photo Service
At our lab in Brooklyn, we process push and pull requests regularly—we've seen everything over the past 30+ years. Our film developing and scanning service includes:
- C-41 push processing up to +2 stops at no extra charge
- Black and white push processing included in standard B&W development pricing
- Standard turnaround of 4-6 business days depending on current volume
- Rush processing available for same-day or next-day completion
When you submit film through our film developing and scanning service, you can specify push or pull processing on the order form. We develop C-41 and B&W in-house.
Our Noritsu scanners handle pushed negatives well, though keep in mind that heavily pushed film (3+ stops) may require adjustments during scanning to balance the increased contrast. We'll make our best effort to deliver usable scans, but understand that pushed film has inherent limitations in shadow detail and tonal smoothness.
Common Mistakes to Avoid
Forgetting to Tell the Lab
The most common mistake we see is unmarked film. If you shot at ISO 1600 but the canister says ISO 400 and there's no note on the order, we'll develop at box speed. Your images will be severely underexposed. Always label your canisters and specify push processing on your order.
Inconsistent ISO Throughout the Roll
Shooting half a roll at ISO 400 and half at ISO 1600, hoping to split the difference in development, doesn't work. Development is a whole-roll process. Commit to one ISO for the entire roll.
Pushing Too Far
There's a romantic notion that film can be pushed indefinitely. The reality is that beyond three stops, you're losing so much shadow detail and adding so much grain and contrast that the results are often unusable. Know your limits.
Pushing in High-Contrast Light
Bright sun with deep shadows is the worst time to push. You'll blow highlights and still have blocked shadows. Save pushing for genuinely low-light situations or overcast conditions.
Frequently Asked Questions
Does pushing film make it faster?
No. Pushing is a development adjustment that compensates for underexposure. The film's actual sensitivity remains unchanged. You're recovering shadow detail that was marginally exposed, not magically creating detail that wasn't captured.
Can I push any film?
Technically, yes. Practically, some films handle pushing better than others. Traditional cubic-grain B&W films (Tri-X, HP5+) push the best. T-grain films and consumer color negative films have more limitations.
What's the maximum push amount?
It depends on the film and your tolerance for grain and contrast. For most B&W films, three stops is practical. For color negative, two stops is the reasonable limit. Beyond these amounts, image quality degrades significantly.
Does push processing cost extra?
At Kubus Photo Service, C-41 push processing up to +2 stops is included in our standard development price. B&W push processing is included in standard B&W development. Some labs charge extra for push processing; check with your lab.
Can I push part of a roll?
No. Development affects the entire roll uniformly. If you need to change ISO mid-roll, you'll need to remove the film and reload later (an advanced technique) or accept that half the roll will be incorrectly developed.
What about pull processing?
Pull processing (overexposing and underdeveloping) reduces contrast by 15-25% per stop and can improve grain. It's useful for high-contrast scenes. Request it the same way you'd request push processing, just with a negative number (-1 or -2 stops).
Should I rate the whole roll at the pushed ISO?
Yes. Set your camera's ISO dial to the speed you're shooting at and meter normally. All frames should receive the same relative underexposure so that push development compensates uniformly.
Push processing is a powerful technique that expands what's possible with film. Understanding the chemistry, the practical limits, and the aesthetic implications lets you use it deliberately rather than as a rescue measure. We recommend shooting a few rolls specifically to test push results with your preferred film stock, and you'll develop an intuitive sense for when pushing serves your vision.
For more technical guides, explore our film developing and scanning page, or start your order through our mail-in film lab. Questions about push processing or any other film technique? Reach out to us at (718) 389-1339.
Kubus Photo Service has been processing film in Greenpoint, Brooklyn since 1994. We handle everything from standard development to specialty processing like push, pull, and cross-processing.
Related Articles
C-41, E-6, and Black & White Film Processing: A Complete Technical Guide
Understanding the differences between C-41, E-6, and black-and-white film processing prevents costly mistakes and helps you communicate effectively with your lab. This comprehensive guide covers the chemistry, film types, and practical considerations for each process.
Ilford HP5 Plus vs Kodak Tri-X 400: The Definitive Comparison for Black and White Photographers
After developing thousands of rolls of HP5 and Tri-X over three decades, we break down the real differences in grain structure, tonal response, push processing characteristics, and which film suits your shooting style.
Film for Concert Photography: Capturing Live Music in Extreme Low Light
Concert photography on film demands high-speed stocks, fast lenses, and push processing techniques. Here's how to capture the energy of live music when every photon counts.
Ready to Develop Your Film?
We're a family-run film lab in Greenpoint, Brooklyn, developing film since 1994. Whether you drop off in store or mail your rolls from anywhere in the US, we treat every frame with care.
How to Mail In Film for Developing: Complete Step-by-Step Guide
Learn exactly how to safely mail your film for professional developing. Step-by-step guide covering packing, shipping options, what to expect, and how to get the best results from a professional film lab.
Read the Complete Guide