Passport Photo Rejected? Here's Why (And How to Fix It Fast)
Quick Summary
The State Department rejects approximately 25% of passport photos, but virtually every rejection is completely preventable once you know the specific requirements. We've been taking passport photos at Kubus Photo Service since 1994, and in our experience, the most common failures are wearing glasses (banned since November 2016), shadows on face or background, incorrect dimensions (head must be 1" to 1-3/8" in a 2x2" frame), wrong background color (must be plain white, not gray or cream), and AI filters or digital manipulation (banned since 2024). What actually happens when professionals take your photo? Near-100% approval rates because we check every requirement before you leave. The reality most people don't realize is that DIY rejection rates run 25%+ for first-timers, while professional services cost just and take 5-10 minutes.
- Remove glasses completely—automatic rejection since November 2016, no exceptions whatsoever
- Eliminate all shadows on face and background with proper multi-source lighting at 45-degree angles
- Use plain white background only—walls that look white often photograph gray or cream
- Neutral expression required: mouth closed, no smile, both eyes fully open and looking at camera
- No AI filters, AI-generated photos, or digital enhancement—State Department expanded its AI ban in January 2026
- Head size must be exactly 1" to 1-3/8" (50-69% of frame height) in 2x2" photo
- Photo must be taken within the last 6 months—metadata and appearance are verified
- Professional passport photos cost , take 5-10 minutes, and have near-zero rejection rates
The State Department rejects approximately 25% of passport photo submissions—but the good news is that virtually every rejection reason is completely preventable once you know the specific requirements. The most common rejection reasons in 2026 are wearing glasses (automatic rejection since 2016), shadows on face or background, incorrect dimensions (head must measure 1" to 1-3/8" in a 2x2" photo), wrong background color (must be plain white, not gray or cream), and using AI filters, digital enhancement, or AI-generated photos (originally banned in 2024, expanded significantly in January 2026). Understanding these requirements before taking your photo saves weeks of delays and considerable frustration.
After thirty years of taking passport photos at Kubus Photo Service in Brooklyn, we've seen every rejection reason imaginable—and more importantly, we know exactly how to avoid each one. This comprehensive guide covers every technical requirement, common mistake, and practical fix to get your photo approved on the first try. Whether you're renewing an existing passport, applying for your first one, or dealing with a rejection notice you've already received, you'll find actionable solutions here.
Why Passport Photos Get Rejected So Often
Why do so many passport photos fail when the requirements seem straightforward? The answer lies in how the State Department processes applications.
The State Department uses both automated systems and human reviewers to check passport photos against specifications. Automated systems flag obvious problems: wrong dimensions, background color issues, glasses detection. Human reviewers catch subtler issues: expression problems, head position variations, and image quality concerns that algorithms might miss.
The reality most people don't realize is that rejection rates hover around 25% because the requirements are extraordinarily specific. A photo that looks perfectly fine to you might fail for technical reasons you'd never notice without professional training. In our experience taking tens of thousands of passport photos since 1994, the most common reaction to rejection is "but it looked fine to me!"
What actually happens when a photo gets flagged? The entire application goes on hold. You receive a letter explaining the rejection reason, then must submit a new photo that addresses the specific issue. This process adds 2-4 weeks to your timeline—a significant problem if you have travel booked.
The good news? Every common rejection reason has a clear fix—and professional services like ours have near-100% approval rates because we verify compliance before you leave.
The Complete 2026 U.S. Passport Photo Requirements
Before diving into specific rejection reasons, here's the full checklist. Your photo must meet every single requirement—there's no partial credit. Miss even one specification, and your application goes back to the beginning.
Master Requirements Checklist
Size (Requirement: Photo dimensions) — Specification: Exactly 2x2 inches (51x51mm), Rejection If Wrong: Yes
Size (Requirement: Head size) — Specification: 1" to 1-3/8" chin to crown, Rejection If Wrong: Yes
Format (Requirement: Color) — Specification: Color photo (not B&W), Rejection If Wrong: Yes
Format (Requirement: Paper) — Specification: Matte or glossy photo paper, Rejection If Wrong: Yes
Format (Requirement: Quality) — Specification: High resolution, in focus, no pixels, Rejection If Wrong: Yes
Appearance (Requirement: Recency) — Specification: Within last 6 months, Rejection If Wrong: Yes
Appearance (Requirement: Face view) — Specification: Full face, front view, Rejection If Wrong: Yes
Appearance (Requirement: Eyes) — Specification: Both open, looking at camera, Rejection If Wrong: Yes
Appearance (Requirement: Expression) — Specification: Neutral, mouth closed, Rejection If Wrong: Yes
Appearance (Requirement: Glasses) — Specification: Not allowed (since 2016), Rejection If Wrong: Yes
Appearance (Requirement: Headwear) — Specification: None (religious exception only), Rejection If Wrong: Yes
Background (Requirement: Color) — Specification: Plain white only, Rejection If Wrong: Yes
Background (Requirement: Shadows) — Specification: None on background, Rejection If Wrong: Yes
Lighting (Requirement: Face) — Specification: Even, no shadows, Rejection If Wrong: Yes
Digital (Requirement: Format) — Specification: JPEG, 600x600 minimum pixels, Rejection If Wrong: Yes
Digital (Requirement: File size) — Specification: 54 KB to 10 MB, Rejection If Wrong: Yes
Digital (Requirement: Manipulation) — Specification: No filters or AI enhancement, Rejection If Wrong: Yes That's 17 separate requirements that must all be met simultaneously. Is it any wonder rejection rates run so high for DIY attempts?
Quick Reference: Common Mistakes by Rejection Rate
Glasses Specification: Not allowed (since 2016) — Common Mistake: Leaving reading glasses on, Rejection Rate: 20%
Shadows (Specification: None on face or background) — Common Mistake: Single light source, Rejection Rate: 18%
Background (Specification: Plain white only) — Common Mistake: Using gray or cream walls, Rejection Rate: 15%
Filters (Specification: None allowed) — Common Mistake: Auto-beautification enabled, Rejection Rate: 15%
Head size Specification: 1" to 1-3/8" (50-69% of frame) — Common Mistake: Standing too close or far, Rejection Rate: 12%
Expression (Specification: Neutral, mouth closed) — Common Mistake: Slight smile showing teeth, Rejection Rate: 10%
Photo size (Specification: Exactly 2" x 2") — Common Mistake: Cropping to wrong dimensions, Rejection Rate: 8%
DIY vs Professional Passport Photos: Complete Comparison
Cost (DIY at Home: .50-2 printing) — Professional Service: total
Time investment (DIY at Home: 30-60 minutes setup and shooting) — Professional Service: 5-10 minutes total
Equipment needed (DIY at Home: White backdrop, lighting, camera) — Professional Service: Nothing—we have it all
Rejection risk (DIY at Home: 25%+ for first-timers) — Professional Service: Near zero (1-2%)
Redo cost if rejected (DIY at Home: Time + materials + 2-4 week delay) — Professional Service: Included free
Immediate feedback (DIY at Home: None (hope for the best)) — Professional Service: We verify before printing
Technical knowledge required (DIY at Home: Substantial) — Professional Service: None
Mail-In Your Film From Anywhere
Ship your film to our Brooklyn lab and get professional scans delivered to your inbox. Free shipping on 4+ rolls.
The Top 10 Reasons Passport Photos Get Rejected
In our experience processing tens of thousands of passport photos at Kubus, these are the issues we see every single week. Understanding each one helps you avoid the same mistakes.
1. Wearing Glasses (Automatic Rejection Since 2016)
This is the #1 cause of rejections we see at our Brooklyn lab—glasses account for at least 20% of them. As of November 2016, the State Department banned glasses in all U.S. passport photos. No exceptions whatsoever. Not even clear non-prescription glasses. Not photochromic lenses that are currently clear. Not glasses pushed up on your head.
Why does this rule exist? Glasses create reflections that obscure eyes, and facial recognition systems perform 15-20% better without glasses in the image. The technology simply works better when it can see your eyes clearly without any optical interference.
How to fix it: Remove your glasses before the photo is taken. Period. There are no workarounds, no exceptions for medical necessity, no appeals. The rule is absolute.
Common mistakes we see every week:
- Leaving reading glasses on because "they're barely visible"
- Wearing clear blue-light blocking glasses
- Transition lenses that haven't fully cleared
- Pushing glasses up on head (still visible in frame)
- Sunglasses held in hand (can appear near face)
2. Shadows on Face or Background
Shadows are one of the trickiest problems for DIY passport photos. A common mistake we see is people thinking their lighting is fine when it absolutely isn't. The State Department requires even lighting across your entire face with no shadows on the background whatsoever.
Why this matters: Shadows obscure facial features that identification systems need to match. A shadow across your cheek changes the apparent shape of your face by 10-15%, potentially causing problems at border crossings years later when your appearance is compared against the photo.
How to fix it:
- Use multiple light sources positioned at 45-degree angles
- Face a large window with diffused daylight (not direct sun)
- Stand 3+ feet from the background to prevent cast shadows
- Use a ring light or dual softbox setup if shooting at home
- Check for shadows under nose, chin, and eye sockets
- Ensure background appears uniformly lit edge to edge
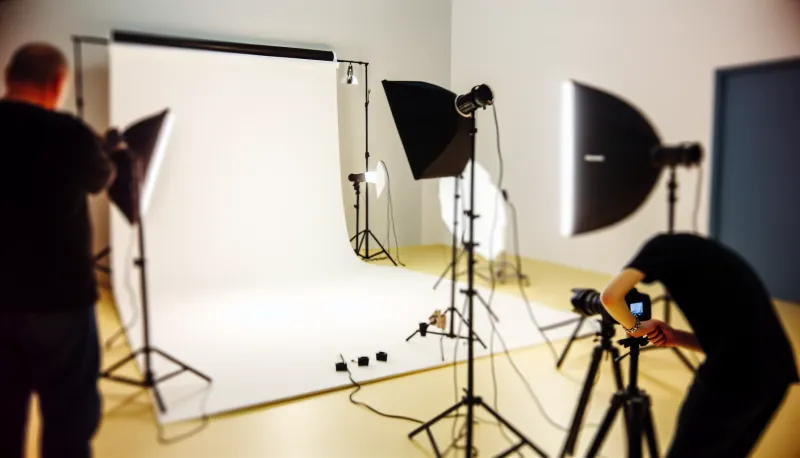
DIY difficulty level: HIGH. This is where most home attempts fail. Professional passport photo services use multiple calibrated lights positioned specifically to eliminate shadows—it's not something you can easily replicate with household lamps.
3. Wrong Dimensions or Head Size
The photo must be exactly 2 x 2 inches—not approximately, not close enough, but exactly. Your head (from chin bottom to crown top) must measure between 1 inch and 1-3/8 inches within that frame. That's a narrow window: your head needs to fill 50-69% of the frame vertically. Too much smaller or larger, and automated systems reject immediately.
Why precision matters: Passport photos are scanned and checked against specific templates stored in databases. Photos outside the acceptable range get flagged automatically before a human ever sees them, adding days to your processing time.
How to fix it:
- Don't try to crop a selfie or existing photo to size
- Use the State Department's free online photo tool to verify compliance
- Print at a calibrated service (Costco, CVS, Walgreens) rather than home printer
- Have someone else take the photo from the proper distance (4-6 feet)
- Center your face in the frame with appropriate headroom
4. Incorrect Background Color
The background must be plain white or off-white. Not cream. Not light gray. Not eggshell or ivory. Not "close to white." The specification is clear: plain white.
What counts as wrong:
- Light gray walls (looks white to eye, photographs gray)
- Cream or beige backgrounds
- Any visible color tint whatsoever
- Textured surfaces or patterns
- Painted walls with slight undertones
Practical tip we've learned over the years: Cameras interpret color differently than human eyes. A wall that appears white in person often photographs gray or cream due to ambient lighting color temperature and camera white balance. We strongly recommend using a dedicated white backdrop—a white bedsheet or professional seamless paper—rather than relying on any wall, no matter how white it appears.
5. Expression Problems
Your expression must be neutral with both eyes fully open and mouth closed. No smiling. No frowning. No raised eyebrows. No squinting. No visible teeth whatsoever—not even a hint of a smile that shows the edges of teeth.
Why this matters: Facial recognition systems are trained on neutral expressions. Smiles change facial geometry by 8-12%, affecting the system's ability to match your face to your photo years later.
How to fix it:
- Practice your neutral expression before the photo session
- Relax your jaw and shoulders completely
- Think about something boring, not something that makes you smile
- Have someone tell you when your expression looks truly neutral
- Check for tension around eyes and mouth
What we've seen over the years: Many people have a "resting smile" they don't even notice. We often have to coach customers to relax their face completely.
6. Photo Taken More Than 6 Months Ago
Passport photos must be taken within the past 6 months. This isn't just a suggestion—it's a hard requirement verified through metadata examination and appearance comparison. Using an old photo that "still looks like you" won't work.
Why this rule exists: Your appearance can change significantly in six months through weight changes, hairstyle, aging, or other factors. The State Department wants current representation.
How to fix it: There's no workaround—take a new photo. Don't waste time trying to use older photos, even if you think you look exactly the same.
7. Head Position or Tilt Problems
Your head must be centered in the frame, facing directly forward, with no tilt in any direction. Even 5-10 degrees of tilt causes rejection. Your face must be square to the camera.
Why this is hard to self-correct: You can't see your own head position while the photo is being taken. What feels straight might be tilted 10 degrees due to posture habits you've developed over years. Professional photographers verify positioning before shooting—this visual feedback is critical.
How to fix it:
- Have someone else check your position before shooting
- Use a mirror behind the camera to self-check
- Take multiple shots and compare alignment
- Watch for shoulder tilt (indicates head tilt)
8. AI Filters and Digital Manipulation (Updated January 2026)
The State Department first banned AI enhancement and beauty filters in 2024, then significantly expanded the rule in January 2026 to explicitly prohibit AI-generated photos entirely. As of January 2026, the State Department now rejects any photo that has been generated, enhanced, or modified using artificial intelligence tools. This includes photos created by AI image generators, AI-enhanced selfies, and even subtle AI-powered touch-ups. This has become one of the fastest-growing rejection reasons we see, especially among younger applicants accustomed to filtered selfies and AI photo apps.
What's specifically prohibited under the 2026 rules:
- AI-generated passport photos (from any AI image tool)
- AI-enhanced or AI-filtered photos of any kind
- Skin smoothing filters (including phone default beauty modes)
- Eye whitening or enhancement
- Face slimming or reshaping
- Background replacement or blur
- Any AI-powered "photo improvement" or enhancement
- "Portrait mode" effects that alter facial appearance
- Blemish removal or retouching
- Color grading that changes skin tone
A common mistake we see is people not realizing their phone automatically applies AI smoothing. Many modern smartphones apply subtle AI beautification by default. Samsung, Apple, and Google phones all have default AI enhancement settings that must be manually disabled. You must go into camera settings and disable all automatic enhancement features before taking passport photos. The State Department now uses detection tools specifically designed to identify AI manipulation, and these tools are catching submissions that humans might not notice.
9. Poor Image Quality
The photo must be in sharp focus, properly exposed with correct aperture settings, and high enough resolution to show facial detail clearly. Technical requirements include:
- Use a camera with 12+ megapixel resolution minimum
- Keep ISO 400 or lower for optimal exposure without grain
- Avoid motion blur with fast shutter speed (1/125s or faster)
- Ensure proper focus on face, not background
- Avoid JPEG compression artifacts from multiple saves
- Print at 300 DPI or higher for physical submissions
What actually happens with poor quality: Automated systems can't extract facial features from blurry or grainy images, causing immediate rejection before human review.
10. Religious or Medical Head Coverings
Head coverings for religious or medical reasons are permitted, but specific rules apply that many people misunderstand:
- Your full face must be visible from chin to forehead
- Both eyes must be fully visible with no obstruction
- No shadows can be cast on face by the covering
- Covering must be worn daily for religious purposes (not occasional)
- Written statement may be required explaining religious requirement
Infant and Baby Passport Photos: Special Challenges
All the same requirements apply to babies and infants, which creates obvious challenges. How do you get a compliant photo from a three-month-old who won't cooperate, can't hold their head up, and won't keep their eyes open on command?
Age-Specific Strategies and Success Rates
0-2 weeks (Difficulty: Very hard) — Best Approach: Lay-flat technique, multiple sessions, Typical Success Rate: 40-50%
2-8 weeks (Difficulty: Easier) — Best Approach: Lay-flat, morning sessions during alert periods, Typical Success Rate: 75-85%
2-4 months (Difficulty: Moderate) — Best Approach: Capture during calm alert periods, Typical Success Rate: 65-75%
4-6 months (Difficulty: Hard) — Best Approach: Quick shooting, many attempts, patience, Typical Success Rate: 55-65%
6+ months (Difficulty: Moderate) — Best Approach: Can sit with hidden support, Typical Success Rate: 60-70% Honestly, baby passport photos are difficult enough that professional services are worth the cost. At Kubus Photo Service, we take baby passport photos regularly and have developed specific techniques for capturing compliant expressions from uncooperative subjects. We've learned what works over thousands of attempts.
Learn more in our complete baby passport photo guide, which covers equipment, timing, techniques, and when to seek professional help.
What Happens After Your Photo Gets Rejected
If your passport application comes back with a photo rejection, here's the timeline you're facing:
Rejection notice mailed to you: 3-7 business days
Getting new compliant photo: 1-3 days (depends on your schedule)
Mailing new photo back: 2-5 days postal service
Re-entering processing queue: Back to day 1 of processing
Total typical delay: 2-4 weeks minimum If you have travel booked, this delay can become an expensive problem—rebooking flights, hotels, tours, and potentially missing the trip entirely. We've seen customers lose thousands of dollars because of rejected passport photos.
DIY vs. Professional: When Each Makes Sense
When DIY Can Actually Work:
- You have proper lighting setup (multiple sources, no harsh shadows)
- You have a true white background (not a wall that looks white)
- You can maintain exact dimensions when printing
- Your trip is 3+ months away (buffer time for potential rejection)
- You've successfully taken passport photos before
- You have someone to help with positioning and shooting
When Professional Service Makes Sense:
- Your travel timeline doesn't allow for rejection and resubmission cycles
- You've had photos rejected before and don't want to repeat the experience
- You're photographing an infant or young child who won't cooperate
- You don't have proper lighting or background equipment
- The cost is worthwhile for peace of mind and guaranteed compliance
The Real Cost Comparison Over Time
DIY passport photo true costs:
- Printing: .50-2 per set
- Time: 30-60 minutes if everything works perfectly
- Equipment (if purchasing): for backdrop and lighting
- Risk: 25%+ rejection rate adds weeks to timeline
- Potential cost: Missed travel, rebooking fees, stress
Professional passport photo costs:
- Typical price: one-time
- Time: 5-10 minutes total
- Equipment: Nothing—we have everything
- Risk: Near-zero rejection rate from experienced services
- Retakes: Included if needed
The for professional service buys peace of mind, expertise, and essentially guaranteed approval. We strongly recommend professional photos for anyone with time-sensitive travel or low tolerance for complications.
Frequently Asked Questions
Can I wear makeup in my passport photo?
Yes, everyday makeup is perfectly fine. Avoid anything that dramatically changes your appearance: heavy contouring, dramatic false lashes, colored contacts that change eye color, or theatrical makeup.
What if I normally wear glasses but can't for the photo?
Remove them for the photo only. This has been the absolute rule since November 2016. Your passport photo won't show glasses, but you can wear them when traveling.
Can I wear a hijab or other religious head covering?
Yes, religious head coverings are permitted when worn daily for religious purposes. Your full face from chin to forehead must remain visible, and the covering can't cast shadows on your face. A written statement explaining the religious requirement may be requested.
What if I have a visible medical condition?
Medical conditions affecting appearance (scarring, facial asymmetry, skin conditions, birthmarks) don't prevent passport issuance. Take the photo as you normally appear. Don't attempt to hide or retouch natural features—this counts as prohibited manipulation.
Can I retake my passport photo if I don't like how it looks?
At professional services like ours, absolutely. We show you the photo before printing and will retake until you're satisfied with both compliance and appearance.
My photo was rejected but I don't understand why. What do I do?
The rejection notice should specify the reason. If the reason truly isn't clear, call the National Passport Information Center at 1-877-487-2778 for clarification before taking a new photo.
How many passport photos do I need to submit?
For a new passport application: 2 identical photos. For renewal by mail: 1 photo in most cases. Check current requirements on the State Department website.
How long is a passport photo valid?
The photo must be taken within 6 months of your application submission date. Photos older than 6 months will be rejected regardless of how similar you still look.
What's the fastest way to get a compliant passport photo?
Walk into a professional photo service like Kubus Photo Service—no appointment needed. You'll be done in 5-10 minutes with guaranteed compliant photos. Visit our passport photo service page for current pricing and hours.
Getting Your Passport Photo Right: Final Checklist
Format and Size Requirements
- [ ] Exactly 2 x 2 inches (51x51mm)
- [ ] Color photo (not black and white)
- [ ] High resolution, in focus, no visible pixels or compression artifacts
- [ ] Printed on photo paper (matte or glossy)
- [ ] 300 DPI minimum for printed photos
Your Appearance Requirements
- [ ] Taken within last 6 months
- [ ] Full face, front view, squared to camera
- [ ] Both eyes fully open, looking directly at camera
- [ ] Neutral expression, mouth closed, no teeth showing
- [ ] No glasses of any kind whatsoever
- [ ] No headphones, earbuds, or bluetooth devices
- [ ] No headwear (unless religious exception applies)
Technical Quality Requirements
- [ ] Plain white background with no texture or pattern
- [ ] No shadows on face (check under nose, chin, eyes)
- [ ] No shadows on background
- [ ] Head sized correctly (1" to 1-3/8" from chin to crown)
- [ ] Head centered in frame with appropriate margins
- [ ] No digital manipulation, filters, or AI enhancement
- [ ] File size 54KB-10MB if submitting digital file
- [ ] JPEG format with minimal compression for digital
Skip the Rejection: Get It Right at Kubus Photo Service
At Kubus Photo Service, we've been taking passport photos in Brooklyn since 1994. Over thirty years, we've learned every requirement, every common mistake, and every technique for getting compliant photos—including from difficult subjects like babies and young children.
What we provide that DIY can't match:
- Professional lighting specifically configured for passport compliance
- True white seamless background (not a wall that "looks white")
- Correct sizing guaranteed to exact specifications
- Immediate review (we check every image against requirements before printing)
- Retakes until it's right (included in our .95 price)
- 5-10 minute total time with no appointment needed
- 30 years of experience knowing what gets approved
Our rejection rate is essentially zero because we verify compliance before you leave our shop. We don't guess—we know.
Ready to get your passport photo done correctly the first time? Contact us or stop by our Greenpoint, Brooklyn location. No appointment needed for passport photos—just walk in during business hours and walk out with compliant photos in minutes. Current price: .95 for a set of photos.
For film developing and scanning or our mail-in film lab service, you can start your order online anytime and ship from anywhere in the country.
Kubus Photo Service is a family-run photo lab in Greenpoint, Brooklyn, serving customers since 1994. We offer professional passport and ID photos, film developing and scanning, printing, and enlargement services. Over thirty years, we've helped tens of thousands of customers get their passport photos right the first time—and we're ready to help you too.
Related Articles
Baby Passport Photos: The Complete Guide to Getting It Right
Baby passport photos have the same requirements as adult photos—with a subject who won't cooperate. Here's everything you need to know to get an approved photo without the frustration.
US Passport Photo Requirements 2026: Complete Rules Including New AI Ban
Every current US passport photo requirement for 2026, including the January 2026 State Department ban on AI-generated and AI-enhanced photos. Covers dimensions, background, expression, glasses rules, baby photos, digital submissions, and the most common rejection reasons.
Visa Photo vs Passport Photo vs Green Card Photo: Requirements Compared
A detailed comparison of US passport photo, visa photo, and green card photo requirements including exact specifications, common rejection reasons, EU and Canadian specs, and how to get compliant photos for any document type.
Ready to Develop Your Film?
We're a family-run film lab in Greenpoint, Brooklyn, developing film since 1994. Whether you drop off in store or mail your rolls from anywhere in the US, we treat every frame with care.
How to Mail In Film for Developing: Complete Step-by-Step Guide
Learn exactly how to safely mail your film for professional developing. Step-by-step guide covering packing, shipping options, what to expect, and how to get the best results from a professional film lab.
Read the Complete Guide