Baby Passport Photos: The Complete Guide to Getting It Right
Quick Summary
Baby passport photos require the exact same 2x2 inch format as adult photos—white background, eyes open, neutral expression, no visible support—but you're working with a subject who won't cooperate with directions. We've been taking passport photos at Kubus Photo Service since 1994, and in our experience, rejection rates for baby photos run 15-20% higher than adult photos because babies can't follow instructions. What actually causes rejections? The most common failures are closed eyes (35% of rejections), visible hands or props (25%), and background issues (20%). The reality most people don't realize is that even professionals need multiple attempts with infants. The sweet spot is ages 2-8 weeks, when babies have predictable alert periods but aren't mobile yet—we've seen 75-85% success rates in this window versus 40-50% for newborns under 2 weeks.
- Same 2x2 inch size and white background requirements as adult passport photos—no flexibility
- Eyes must be fully open—schedule during alert periods and take 50+ shots per session
- No hands, car seats, props, or support visible in final photo—use lay-flat technique
- Ages 2-8 weeks offer best success rates: 75-85% vs 40-50% for newborns under 2 weeks
- Rejection rates by cause: closed eyes (35%), visible support (25%), background (20%), expression (12%)
- Professional help () is worth considering after 2-3 failed DIY attempts
- Use natural window light rather than flash to avoid red-eye and startling baby
- Start passport process 3+ months before travel—photo rejection adds 2-4 weeks to timeline
Baby passport photos follow the same rigid specifications as adult photos—2x2 inches, white background, eyes open, neutral expression, facing forward—but here's the reality most people don't realize: you're applying strict government requirements to a subject with zero interest in complying. This creates one of the more stressful tasks on any new parent's already overwhelming checklist, and rejection rates reflect that difficulty.
We've been taking passport photos at Kubus Photo Service in our Brooklyn lab since 1994, and baby passport photos are uniquely challenging even for professionals. In our experience helping thousands of families over thirty years, the requirements aren't flexible, babies don't take direction, and rejection rates run about 15-20% higher than for adult photos. But with the right approach, reasonable expectations, proper technique, and sometimes professional help, you can get an approved photo without losing your mind or your entire afternoon.
Official Requirements: What the State Department Demands
The State Department's requirements for infant passport photos are identical to adult requirements, with one small accommodation for eye gaze in very young infants. Why don't they cut parents some slack? Because passport photos serve a security and identification function that doesn't change based on the subject's age—border agents need to verify your baby's identity just like they verify yours.
Complete Baby Passport Photo Requirements Table
Size Exact Specification: Exactly 2x2 inches (51x51mm) — Common Mistake Parents Make: Cropping from selfie or phone photo, Rejection Rate: 8%
Head size Exact Specification: 1" to 1-3/8" chin to crown — Common Mistake Parents Make: Baby positioned too far or too close, Rejection Rate: 12%
Background (Exact Specification: Plain white only) — Common Mistake Parents Make: Gray walls, textured surfaces, shadows, Rejection Rate: 20%
Eyes (Exact Specification: Open and clearly visible) — Common Mistake Parents Make: Sleeping or drowsy baby, Rejection Rate: 35%
Expression Exact Specification: Neutral (slight natural expression okay for infants) — Common Mistake Parents Make: Crying, laughing, yawning, Rejection Rate: 12%
Support (Exact Specification: No visible hands, props, or seats) — Common Mistake Parents Make: Parent's hands visible in frame, Rejection Rate: 25%
Quality (Exact Specification: Sharp focus, proper exposure) — Common Mistake Parents Make: Motion blur from wiggling baby, Rejection Rate: 8%
Recency (Exact Specification: Within last 6 months) — Common Mistake Parents Make: Using older photo, Rejection Rate: 5%
Background Requirements: Why "White Enough" Isn't Good Enough
Plain white or off-white only. No cream, light gray, patterns, textures, or visible shadows on the background. The background must be evenly lit throughout the entire visible area.
A common mistake we see every week at Kubus is backgrounds that looked white to the eye but photographed as off-gray. Cameras interpret color differently than human eyes due to white balance settings and ambient light color temperature. Professional setups use seamless paper specifically designed for even, shadow-free, true-white results. That white bedsheet your grandmother gave you? It might photograph cream or gray depending on your lighting.
The Eyes-Open Requirement: Where Most DIY Attempts Fail
Eyes must be open and clearly visible. This single specification is responsible for more baby passport photo rejections than any other factor. Partial eye closure, droopy eyelids, or sleeping babies will be rejected every single time.
The small accommodation for infants: Perfect forward gaze isn't strictly required for very young babies who can't yet control their eye movement or focus on objects. This is the only flexibility the State Department offers—and it's minimal. Eyes still need to be open; they just don't need to be staring directly at the camera lens.
What we've seen over the years is that this accommodation helps newborns, but it doesn't help with the fundamental challenge: getting a baby's eyes open at the right moment.
No Visible Support, Props, or Hands
The baby must appear completely alone in the photo. Nothing else can be visible in the final image:
- No hands (even if supporting the baby's head from behind)
- No car seats, bouncy chairs, or strollers
- No blankets, towels, or fabric other than background
- No pacifiers, toys, or comfort objects
- No headbands, bows, hats, or hair accessories
This creates the core practical challenge: how do you photograph a baby who can't sit independently without any visible support? The answer involves either the lay-flat technique or careful positioning with support hidden outside the frame.
Expression and Position Requirements
Neutral expression, forward-facing. For infants under about six months, some latitude exists—a slight natural expression is acceptable since babies this young have limited facial muscle control. But the face must be forward-facing (not turned left or right), and the expression can't be extreme:
-
No crying faces (even "cute" crying)
-
No wide-mouthed laughing
-
No yawning or grimacing
-
No tongue sticking out
-
No extreme frowning
Age Considerations: When Is the Best Time to Attempt Photos?
There's no minimum age for passport photos—newborns can legally be photographed at 3 days old if needed for emergency travel. But different ages present very different challenges with very different success rates. Over thirty years at Kubus, we've found that timing makes a significant difference in how many attempts you'll need.
Age-by-Age Success Rates and Recommended Strategies
0-2 weeks (Difficulty Level: Very Hard) — Typical Success Rate: 40-50%, Key Challenge: Eyes rarely fully open, Best Strategy: Multiple sessions over different days
2-8 weeks (Difficulty Level: Easiest Window) — Typical Success Rate: 75-85%, Key Challenge: Limited head control, Best Strategy: Lay-flat technique, morning sessions
2-4 months (Difficulty Level: Moderate) — Typical Success Rate: 65-75%, Key Challenge: Variable expressions, alert periods, Best Strategy: Capture during calm alert periods
4-6 months Difficulty Level: Moderate-Hard — Typical Success Rate: 55-65%, Key Challenge: Won't stay still, grabby hands, Best Strategy: Work quickly, take 50+ shots per session
6-12 months (Difficulty Level: Moderate) — Typical Success Rate: 60-70%, Key Challenge: Very active, easily distracted, Best Strategy: Can sit with hidden support, need distractions
2-8 Weeks: The Sweet Spot Most Parents Miss
This is the sweet spot for infant passport photos, and most parents don't realize it. Babies in this age range have more predictable alert periods (30-60 minutes where eyes stay open after feeding), but they're not yet mobile—they'll stay on a white sheet without trying to roll off it or grab at the camera.
We recommend this window to every parent who asks—we've processed thousands of baby photos over our 30 years in Brooklyn, and this age range consistently produces the best results with the fewest attempts. If you know you'll need a baby passport, consider getting the photo done during this window even if travel isn't imminent.
Remember: Children's Passports Are Valid Only 5 Years
Your newborn won't need to match that passport photo at age 4—new photos are required with each passport renewal. Children's passports expire after 5 years specifically because their appearance changes so dramatically. Focus on compliance and approval, not on getting a beautiful keepsake photo. The goal is a photo the State Department will accept, not a photo you'll frame.
Mail-In Your Film From Anywhere
Ship your film to our Brooklyn lab and get professional scans delivered to your inbox. Free shipping on 4+ rolls.
DIY Techniques: The White Sheet Method Explained
For parents who want to try taking passport photos at home, the most reliable approach is photographing the baby from above while they lie on a white surface. This eliminates the need for the baby to sit up or hold their head steady.
Equipment Checklist and Costs
Plain white bedsheet (Purpose: Background surface) — Approximate Cost: , Notes: Must be wrinkle-free
Iron Purpose: Remove wrinkles (critical step) — Approximate Cost: Already own, Notes: Wrinkles cause rejection
Large window (Purpose: Natural diffused lighting) — Approximate Cost: Free, Notes: North-facing ideal
Smartphone or camera (Purpose: Capture image) — Approximate Cost: Already own, Notes: 12+ megapixel resolution
White foam board (optional) (Purpose: Fill shadows) — Approximate Cost: , Notes: Reflects light into shadows
Total investment (Approximate Cost: ****) — Notes: Assuming you own basics
Setup Process: Step by Step
Step 1: Prepare the surface properly
Lay a plain white bedsheet on a flat, firm surface—a bed, changing table, or floor all work. The sheet must be completely wrinkle-free—wrinkles create shadows and texture that cause rejection. Iron the sheet if necessary, even if it looks "fine" to your eye. Cameras pick up texture your eyes might miss.
Step 2: Position near natural light
Position the setup near a large window with indirect natural light. The ideal is bright but diffused—direct sunlight creates harsh shadows, while dim lighting requires high ISO settings that create grainy images.
Best times and conditions:
- Morning (7-10 AM): Soft, even light; babies often alert after first sleep
- Overcast days: Ideal—clouds diffuse light naturally for even illumination
- North-facing windows: Consistent indirect light without harsh sun
Avoid:
- Direct sunlight through windows (harsh shadows)
- Evening (baby likely tired, light getting warm/orange)
- Artificial room lighting only (insufficient quality, wrong color temperature)
Step 3: Set up camera position
Photograph directly downward from above, perpendicular to the surface. Your shadow shouldn't fall on the baby or the sheet. Have someone else hold the camera if possible—it's difficult to position yourself and shoot simultaneously without casting shadows.
Taking the Shot: The 50-Shot Method That Actually Works
Timing is everything for baby photos. Choose a time when your baby is typically alert—usually 30-60 minutes after a nap but before getting tired again, and after feeding but not during the post-meal sleepy phase.
Camera settings for smartphones:
- Turn OFF all beauty/enhancement filters (check settings menu)
- Disable HDR (can cause motion blur artifacts with moving subjects)
- Use rear camera, not selfie camera (much higher resolution and quality)
- Tap on baby's face to set focus and exposure lock
- Consider burst mode for multiple rapid shots capturing different moments
- Ensure you have 12+ megapixels for adequate resolution
The 50-shot approach we recommend:
Don't expect one perfect frame on the first attempt. Take 30, 50, or even 100 photos per session. You're waiting for that one lucky moment where eyes are fully open, expression happens to be neutral, focus is sharp on the face, and face is reasonably centered in frame. Professional photographers know this—even with cooperative adult subjects, the best shot is rarely the first shot.
The reality most people don't realize is that professionals take dozens or hundreds of shots to get one perfect frame—even with adults who can follow directions. With babies, the numbers increase dramatically. Don't get frustrated if the first 20 shots don't work.
Processing and Printing Requirements
Once you have a usable shot, crop and size the image precisely to 2x2 inches at 300 DPI minimum (600x600 pixels at the absolute minimum for digital submission, but higher is better).
Professional print service (Costco, Walgreens, CVS) Cost Range: .50-2 — Sizing Accuracy: High—calibrated equipment, Our Recommendation: Best choice for DIY
Home photo printer with photo paper Cost Range: — Sizing Accuracy: Medium—requires calibration, Our Recommendation: Proceed with caution
Standard inkjet printer on regular paper (Cost Range: .10) — Sizing Accuracy: Low—often unacceptable, Our Recommendation: Don't use We strongly recommend using a professional print service rather than home printing. Many home printers have slight scaling issues (2-5% off) that cause automatic rejection by measurement verification systems. The saved isn't worth the rejection risk.
Common DIY Problems: How to Prevent and Fix Each One
A common mistake we see is parents underestimating how difficult it is to get all requirements met simultaneously. After thirty years of seeing rejected baby photos brought into Kubus, here are the problems that trip up even prepared parents.
Troubleshooting Table
Gray background (What Causes It: Underexposure, ambient light color, wall color) — How to Prevent It: Use pure white sheet, bright window light, How to Fix It: Boost exposure settings, reshoot
Closed or half-closed eyes (What Causes It: Wrong timing, tired baby, light sensitivity) — How to Prevent It: Schedule during natural alert windows, How to Fix It: Wait and try different day
Red-eye (What Causes It: Direct flash use) — How to Prevent It: Use natural light only, avoid flash, How to Fix It: Reshoot without any flash
Visible support or hands (What Causes It: Hands in frame, props showing) — How to Prevent It: Use lay-flat technique properly, How to Fix It: Crop very carefully or reshoot
Motion blur (What Causes It: Slow shutter speed, baby moving) — How to Prevent It: 1/125s minimum shutter, burst mode, How to Fix It: Increase ISO setting, reshoot
Shadows on face (What Causes It: Side lighting only) — How to Prevent It: Large frontal window, add fill reflector, How to Fix It: Reposition, add light source
Background shadows (What Causes It: Subject too close to backdrop) — How to Prevent It: Ensure baby on top of backdrop, not near wall, How to Fix It: Use proper lay-flat setup
Expression issues What Causes It: Over-stimulation, wrong timing — How to Prevent It: Keep environment calm, minimal interaction, How to Fix It: Wait for natural neutral moment
Problem: Eyes Closed in Every Single Shot
What causes it: Baby is tired (wrong timing), baby closes eyes reflexively to light, baby is simply at a sleepy developmental stage.
How to fix it: Wait. Try again another day at a different time. You cannot force a sleepy baby's eyes open—and even if you could somehow manage it, the resulting photo would look terrible and likely still be rejected. Sometimes the honest answer is that today isn't the day. Come back tomorrow during a different alert window.
Problem: Baby Won't Stop Moving
What causes it: Baby is overstimulated, uncomfortable, or simply at an active developmental stage (4-6 months is particularly challenging).
How to fix it: Use burst mode to capture rapid-fire shots, increasing your chances of catching a usable moment. Work faster—get everything set up before bringing baby into position. Keep the environment calm with minimal stimulation. Have a helper ready to remove their hands from frame immediately after positioning.
When DIY Doesn't Work: Considering Professional Help
Baby passport photos have higher rejection rates than adult photos—15-20% higher in our experience at Kubus. There's no shame in seeking professional help—this is legitimately one of the harder photography tasks parents face, and we see experienced photographers struggle with their own children.
We've seen countless exhausted parents come into our Brooklyn shop after multiple failed DIY attempts, and the relief on their faces when we get a compliant photo in 5 minutes is palpable. Sometimes the smart choice is knowing when to get help.
When Professional Service Makes More Sense
Multiple DIY attempts have already failed (DIY Risk Level: High risk) — Professional Recommendation: Strongly recommend professional
Trip departure is in less than 3 weeks (DIY Risk Level: Medium-High risk) — Professional Recommendation: Recommend professional
Baby is under 2 weeks old (DIY Risk Level: High difficulty) — Professional Recommendation: Recommend professional
No good natural light source at home (DIY Risk Level: Medium risk) — Professional Recommendation: Consider professional
Already stressed with new baby demands (DIY Risk Level: Any) — Professional Recommendation: Recommend professional (peace of mind)
Ample time, good equipment, patient disposition (DIY Risk Level: Low risk) — Professional Recommendation: DIY can work with persistence
What Professional Services Actually Provide
Professional photo services have purpose-built setups that eliminate the variables causing most DIY failures:
- Consistent lighting: Multiple calibrated studio lights eliminate shadow problems regardless of weather or time of day
- Proper background: True white, seamless, evenly lit backdrop designed for passport compliance
- Correct sizing: Calibrated output that meets dimensional requirements precisely every time
- Experience: Developed techniques for getting usable shots from uncooperative subjects of all ages
- Faster feedback: We review photos immediately against requirements before you leave
- Retakes included: Most professional services (including ours) retake until you have an approved image at no extra charge
- Knowledge: We know what causes rejections because we see them constantly
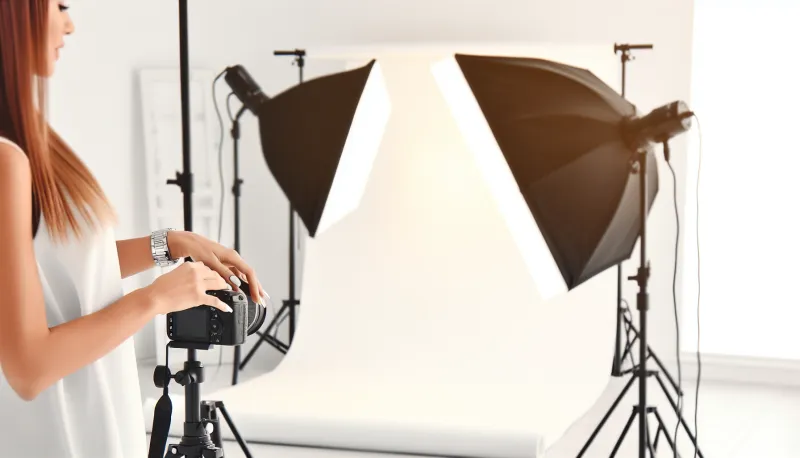
Baby Passport Photos at Kubus Photo Service
At Kubus Photo Service in Greenpoint, Brooklyn, we've been taking passport photos since 1994, including hundreds of baby and infant photos each year. Over thirty years, we've developed techniques that work for the most challenging subjects—and babies definitely qualify as challenging subjects.
Age guidance for our service: We photograph babies who are approximately 6 months and older—once your baby has sufficient neck strength to support their own head while sitting. A parent assists by supporting the baby's lower back and legs while the baby sits upright (all support is positioned outside the visible frame).
For younger infants (under 6 months): We recommend using the white sheet lay-flat technique at home following this guide, or visiting a studio that specializes specifically in newborn photography with dedicated infant equipment and positioning tools.
What we provide for baby photos:
- Professional studio lighting configured specifically for passport compliance
- True white seamless background
- Correct 2x2" sizing guaranteed
- Immediate review (you see and approve the photo before we print)
- Multiple shots until we capture a compliant frame
- Retakes if needed at no additional charge
No appointment needed for passport photos: Stop by during business hours. Mornings (before 11 AM) tend to be less busy and often align better with baby alert periods.
Cost: .95 for passport photos (same price for babies and adults)
Visit our passport photo service page for hours and location, or just walk in. We also offer film developing and scanning and our mail-in film lab serves photographers nationwide.
Avoiding the Most Common Rejection Reasons
Top Rejection Reasons for Baby Photos by Frequency
Eyes not fully open (Percentage of Baby Rejections: 35%) — Primary Prevention Method: Schedule during alert periods, take 50+ shots minimum
Visible support, props, or hands (Percentage of Baby Rejections: 25%) — Primary Prevention Method: Lay-flat technique, careful positioning and cropping
Background problems (color, shadows, texture) (Percentage of Baby Rejections: 20%) — Primary Prevention Method: Use true white seamless backdrop, proper lighting
Expression issues (crying, laughing, yawning) (Percentage of Baby Rejections: 12%) — Primary Prevention Method: Capture during calm moments, patience
Technical quality (blur, exposure, resolution) (Percentage of Baby Rejections: 8%) — Primary Prevention Method: Proper camera settings, fast shutter speed, adequate megapixels
Timeline Considerations: Don't Wait Until the Last Minute
Passport processing times vary, and adding a photo rejection into the mix can create serious problems for travel plans.
Routine processing (Current Typical Wait Time: 6-8 weeks) — Application Cost (Under 16):
Expedited processing (Current Typical Wait Time: 2-3 weeks) — Application Cost (Under 16): + expedite fee
Urgent appointment (agency visit) (Current Typical Wait Time: 24-72 hours) — Application Cost (Under 16): Varies by situation Factor in additional time requirements:
- Time to capture successful compliant photo: 1-7 days (depends on baby's cooperation)
- Potential photo rejection and resubmission cycle: 2-4 weeks additional delay
- Gathering other required documents: 1-3 days
Our strong recommendation: Start early. If your trip is three months away, begin the passport process immediately. If your trip is four weeks away, you're already in expedited territory with no room for complications. Baby photos are unpredictable—don't assume you'll get a usable shot on the first attempt.
Frequently Asked Questions
Can I hold my baby during the passport photo?
No—your hands and body cannot appear anywhere in the photo. Use the lay-flat technique for babies who can't sit up, or support only the lower body (completely outside the crop area) for older babies who can sit with minimal support.
How soon can a newborn get a passport photo taken?
There's no minimum age requirement. Passport photos can legally be taken at any age, including days old for emergency travel situations. In our experience, 2-4 weeks is the earliest practical window for most families due to the eyes-open requirement, but it can be done earlier if necessary.
What if my baby won't stop crying during the session?
Wait. Reschedule. Come back another time when baby is in a better mood. No photographer—regardless of experience or equipment—can get a usable passport photo of an actively crying baby. The expression won't meet requirements regardless of what we do. This isn't a failure; it's simply recognizing when conditions aren't right.
Can my baby wear a headband, bow, or hat?
No—no head coverings are permitted except those worn daily for documented religious purposes. Decorative accessories must be removed.
My baby has a birthmark or facial difference. Is that a problem?
No—natural features including birthmarks, hemangiomas, and other visible differences are acceptable and should be visible in the photo exactly as they appear. Don't try to hide, cover, or edit out natural features—this would count as prohibited "digital manipulation" and cause rejection.
The photo was rejected. What do I do now?
Submit a new photo that specifically addresses the stated rejection reason. This will delay your application by 2-4 weeks typically. Read the rejection notice carefully to understand exactly what went wrong.
Should I try to make my baby smile for the photo?
No—neutral expression is required. Don't try to induce smiling or laughing. Wait for a naturally calm, neutral moment.
How long do I have to use this passport photo?
Children's passports are valid for 5 years. New photos are required for each passport renewal. Your baby at 6 months won't need to look like the photo at age 4—a new photo will be required.
Why is the rejection rate so much higher for babies than adults?
Babies can't follow instructions. They won't look at the camera on command, won't maintain a neutral expression on request, won't keep their eyes open when asked, and won't stay still when needed. The technical requirements are identical to adult photos, but compliance is entirely dependent on capturing a lucky moment rather than direction.
The Bottom Line: Realistic Expectations
Baby passport photos combine strict government requirements with completely unpredictable subjects who have zero interest in cooperating. That combination is inherently challenging, and there's no magic technique that makes it easy or predictable.
The best approaches based on our thirty years of experience:
- Understand every requirement thobefore starting any attempt
- Set up properly: correct lighting, true white background, correct camera settings
- Choose timing based on your individual baby's alert patterns and feeding schedule
- Take many, many photos (50+ minimum per session, 100+ if needed)
- Be prepared for multiple sessions across different days—it's normal
- Consider professional help if DIY isn't working after 2-3 serious attempts
- Start the passport process early—don't wait until weeks before your trip
- Focus on compliance and approval, not on getting a beautiful photo
The good news: Millions of babies get successful passport photos every year. Your baby can too—it just might take some patience and multiple attempts.
Ready to get your baby's passport photo done by professionals? Learn about our passport photo services | Film developing and scanning | Mail-in film lab
Contact us with questions—we've helped thousands of families through this exact process at our Brooklyn lab, and we're happy to help you too.
Kubus Photo Service is a family-run photo lab in Greenpoint, Brooklyn, serving customers since 1994. We offer professional passport photos for all ages, film developing and scanning, and printing services. Over thirty years, we've seen every baby passport photo challenge imaginable—and we're here to help you navigate this process successfully.
Ready to Develop Your Film?
We're a family-run film lab in Greenpoint, Brooklyn, developing film since 1994. Whether you drop off in store or mail your rolls from anywhere in the US, we treat every frame with care.
How to Mail In Film for Developing: Complete Step-by-Step Guide
Learn exactly how to safely mail your film for professional developing. Step-by-step guide covering packing, shipping options, what to expect, and how to get the best results from a professional film lab.
Read the Complete Guide