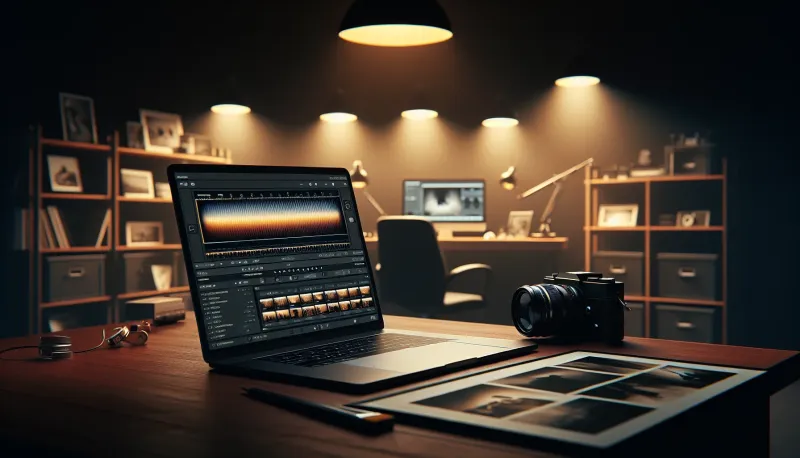
How to Edit Film Scans Without Destroying the Analog Look
Quick Summary
Quality film scans need minimal intervention, and in our experience, 80% of well-exposed film scans require nothing beyond dust removal. Correct white balance only if colors are objectively wrong from mixed lighting. Limit exposure adjustments to +/- 0.5 stops to maintain film's natural tonal character. Clone out dust and scratches systematically. Resist adding contrast or saturation since film already has these baked in by Kodak and Fuji's color scientists. Over the years at Kubus Photo Service, we've seen countless photographers over-edit their film scans and destroy the very qualities that made them shoot film in the first place.
- White balance: Only adjust if lighting created obvious color casts (tungsten, fluorescent)
- Exposure: Stay within +/- 0.5 stops to maintain film's tonal character
- Dust removal: Healing brush for spots, clone stamp for scratches near edges
- Contrast/saturation: Film already has these built in - adding more looks fake
- Sharpening: Amount 25-40, Radius 0.8-1.0 maximum - over-sharpening emphasizes grain harshly
- 80% of editing time should go to dust removal, not color adjustments
- Batch process rolls shot under consistent conditions for workflow efficiency
Quality film scans need minimal intervention. In our experience, 80% of well-exposed film scans require nothing beyond dust removal. Correct white balance only if colors are objectively wrong. Limit exposure adjustments to half a stop. Clone out dust and scratches. Resist adding contrast or saturation since film already has these built in.
There's a look that screams "I don't know how to edit film scans." You've seen it: muddy shadows pushed too far, skin tones veering into orange, grain sharpened into something resembling sandpaper, contrast cranked until midtones disappear. The photographer took a perfectly good Portra scan and turned it into something that looks worse than their phone camera.
Film already has a look. Kodak and Fuji and Ilford employed teams of chemists who spent careers perfecting how their emulsions render color, contrast, and tone. When you scan film properly, that character comes through. Your job in post-processing is to correct genuine problems while letting the film do what film does.
Why do so many photographers over-edit their film scans? What actually needs fixing versus what should be left alone? And how do you develop the restraint to let good scans stay good? What separates a well-edited scan from an over-processed mess? At Kubus Photo Service, we've been developing and scanning film in Brooklyn since 1994. We've watched photographers' editing habits evolve from minimal to maximalist and back again. The best results come from photographers who understand what needs fixing and what should be left alone.
The Mindset Shift: Film Isn't Digital
Digital RAW files are intentionally flat. Camera manufacturers design sensors to capture maximum dynamic range, leaving contrast and color decisions to post-processing. A straight-out-of-camera RAW file looks lifeless because it's meant to be edited.
Film isn't like this. When Kodak designed Portra 400, they made decisions about contrast, saturation, color rendering, and tonal response. Those decisions are baked into the emulsion. You're not working with raw sensor data. You're working with a product that already has a visual identity.
This changes your editing approach fundamentally. Instead of building an image from a flat foundation, you're refining something that already has character. The question isn't "what look do I want to create?" but "what problems need solving?" We recommend asking yourself this before every editing session.
What Actually Needs Editing
Not every scan requires intervention. Many of your best frames will need nothing beyond dust removal. Here's how to identify genuine problems versus film characteristics you should preserve.
Color Casts That Need Correction
Color casts come from two sources: lighting conditions and scanner interpretation.
Tungsten lighting on daylight film (Example: Orange skin, warm overall) — Fix Required?: Yes, correct toward neutral
Fluorescent tubes (Example: Green cast on skin) — Fix Required?: Yes, remove green
Scanner over-compensation (Example: Blue sand on beach photo) — Fix Required?: Yes, manual correction
Golden hour warmth (Example: Natural afternoon glow) — Fix Required?: No - this is accurate
Film stock character (Example: Portra's creamy tones) — Fix Required?: No - this is why you chose it Lighting-based casts happen when your film balanced for daylight encounters tungsten bulbs, fluorescent tubes, or sodium vapor lamps. The classic example: you shot Portra 400 (daylight-balanced) at a restaurant with warm tungsten lighting, and now everyone looks orange. This needs correction.
Scanner-based casts happen when automatic color balancing algorithms make poor choices. Mixed lighting scenes confuse scanners. So do images with large areas of single colors. If your beach photo has blue sand because the scanner over-compensated for the blue sky, that needs correction.
But here's the distinction: subtle warmth in afternoon light isn't a cast. It's accurate. The golden hour actually looks golden. Cooling that down to neutral isn't correction. It's destruction of what your eyes actually saw.
Color Characteristics to Preserve
Different films render color differently. That's why you choose them. Have you ever wondered why professionals pick specific film stocks? Here's what makes each one special:
- Kodak Portra's creamy skin tones and muted yellows
- Fuji Pro 400H's soft greens and cooler shadows
- Ektar's saturated punch and bold colors
- Cinestill's halation around highlights
- Tri-X's characteristic grain and midtone rendering
- Gold 200's warm, nostalgic color palette
These aren't problems. These are features.
If you shot Ektar because you wanted bold colors and then you desaturate in editing, why did you buy Ektar? You've defeated the purpose. If you chose Portra for its gentle rendering and then crank saturation to match digital, you've wasted the film's character.
Learn to distinguish between film character (preserve it) and actual problems (fix them). You'll thank yourself later.
Exposure Issues Worth Addressing
Film has substantial latitude, especially color negative film. Portra 400 can be overexposed by two stops and still produce usable images. That's a feature, not a problem.
But sometimes exposure does need help:
- Underexposed shadows where you need to see detail. Push them gently, watching for noise and color shifts in the darkest areas.
- Highlight clipping where important detail has blown out. Pull highlights down, understanding that truly clipped areas have no recoverable data.
- Inconsistent exposure across a roll that makes images feel disconnected. Gentle adjustments can bring them into consistent range.
Notice the word "gently" repeating? Film tolerates small adjustments gracefully. Large adjustments (more than +/- 1 stop) introduce artifacts, posterization, and that "over-edited" look.
Mail-In Your Film From Anywhere
Ship your film to our Brooklyn lab and get professional scans delivered to your inbox. Free shipping on 4+ rolls.
The Editing Workflow: Order Matters
Editing operations interact with each other. Doing them in the wrong order can create problems you then need to fix, creating more problems. Here's the sequence that minimizes issues.
Step 1: Evaluate the Scan First
Before touching any sliders, look at the image. Zoom to 100%. Pan around. Ask yourself:
- What do I like about this image as-is?
- What specific problems do I see?
- What's the minimum intervention needed?
- Does this scan even need editing at all?
A common mistake we see is photographers who skip this step and jump straight into adjustments. That's backwards. You should know what you're fixing before you start fixing.
Step 2: White Balance (If Actually Needed)
White balance affects everything downstream. Get this right first or you'll be fighting color issues through every other adjustment.
In Lightroom, use the white balance eyedropper on something you know should be neutral gray or white. Not brilliant white (that might be clipped). Not cream or off-white (that has actual color). Something truly neutral.
Don't have a neutral reference? Make manual adjustments:
- Move the Temperature slider in small increments (25-50K at a time)
- Watch how skin tones, whites, and shadows respond
- Stop when things look natural, not when the numbers say "correct"
One critical warning: daylight-balanced film shot under different lighting should be corrected toward neutral, but not necessarily to neutral. A sunset should feel warm. A blue hour scene should feel cool. Overcorrecting removes the mood that made the image worth taking.
Step 3: Exposure Adjustments
After white balance, assess exposure. Most scans from professional labs like our mail-in film lab are well-exposed. Our Noritsu equipment analyzes each frame and optimizes scanner exposure accordingly. But you might want to fine-tune.
Overall exposure (Recommended Range: +/- 0.5 stops) — Warning Sign: Posterization in gradients
Highlights (Recommended Range: -30 to +30) — Warning Sign: Highlight halos
Shadows (Recommended Range: -20 to +40) — Warning Sign: Color shifts, noise
Whites (Recommended Range: -10 to +15) — Warning Sign: Clipping
Blacks (Recommended Range: -15 to +10) — Warning Sign: Blocked shadows Overall exposure: Stay within half a stop either direction. Larger adjustments start revealing the limitations of your file format (especially JPEG) and the scanner's dynamic range.
Highlights and shadows: Use these sliders for targeted adjustments rather than pushing overall exposure. Need shadow detail? Lift shadows specifically. Don't push overall exposure up just to brighten shadows.
Whites and blacks: These set the endpoints of your tonal range. Use them to ensure you have true black and true white somewhere in the image, unless the scene genuinely lacked those values.
Step 4: Contrast (Usually Skip This)
Film has built-in contrast. Each emulsion has a characteristic curve that determines how it maps scene brightness to density. When you add contrast in post, you're steepening a curve that's already shaped.
The result often looks fake:
- Shadows block up unnaturally
- Highlights blow out prematurely
- Midtones feel compressed and harsh
- That "I overcooked this in Lightroom" look appears
- Natural gradations become stepped and posterized
The reality is that treating film contrast like digital contrast doesn't work.
If you feel an image needs more punch, try increasing Clarity slightly (10-20) instead of Contrast. Clarity adds midtone contrast without crushing shadows or clipping highlights. Or address contrast through the Tone Curve with a gentle S-curve that affects midtones more than endpoints.
But seriously: most film scans don't need any contrast adjustment. If your scans consistently feel flat, that's a scanning issue or development issue, not an editing issue. Talk to your lab.
Step 5: Saturation (Almost Always Skip This)
This is where people destroy film images most reliably.
Film saturation is designed. Portra's muted character is intentional. Ektar's vibrancy is intentional. When you grab the Saturation slider and push it up, you're overriding decisions made by world-class color scientists.
The almost-universal result:
- Skin tones turn orange or red
- Blues become electric and unnatural
- Reds clip and lose detail
- The image screams "I was edited by someone who doesn't understand film"
Vibrance is slightly safer than Saturation since it protects skin tones somewhat. But even Vibrance rarely improves a properly exposed, properly scanned film image.
If you consistently feel your film scans aren't saturated enough, you're either shooting the wrong film for your taste or your scanner/lab is producing flat scans. Address the source problem rather than trying to fix it in post.
Step 6: Dust and Scratch Removal
This is where you should spend your editing time. Dust happens. Even careful handling and clean scanning can't eliminate every speck. Clean up the distractions.
Healing Brush (Lightroom) or Spot Healing Brush (Photoshop): Perfect for dust spots. Click on the speck, and the software samples surrounding pixels to cover it. Works beautifully on most textures.
Clone Stamp: Better for scratches or defects near edges and details. The Healing Brush can create weird halos when working near high-contrast areas. Clone Stamp gives you direct control over the source pixels.
Systematic approach: Zoom to 100% and pan across the entire image systematically. It's easy to spot the dust mote in the sky but miss the one on the subject's forehead. Check everywhere. We recommend starting top-left and working right, then down, like reading a page.
One note: grain isn't dust. Those tiny dots that appear uniformly across the image are silver halide crystals or dye clouds. They're supposed to be there. Don't try to "fix" grain - it's not a problem.
Step 7: Sharpening (Optional, Light Touch)
Film scans often benefit from slight sharpening since the scanning process introduces a tiny amount of softness. But this is where light touch matters most.
Over-sharpened film looks terrible:
- The grain becomes aggressive, almost crystalline
- Edges develop halos
- The image loses its organic quality
- It starts looking digital in the worst way
In Lightroom, we recommend:
Amount (Recommended Value: 25-40) — Maximum: 60
Radius (Recommended Value: 0.8-1.0) — Maximum: 1.2
Detail (Recommended Value: 15-25) — Maximum: 35
Masking (Recommended Value: 40-60) — Maximum: 80 Masking helps: hold Alt/Option while adjusting the Masking slider. White areas get sharpened; black areas don't. Raise Masking until smooth areas (sky, skin, out-of-focus backgrounds) turn black, protecting them from over-sharpening while still crisping up edges and details.
Step 8: Cropping (If Necessary)
Crop to improve composition or remove distractions. But respect your frame.
Film photographers often compose more carefully than digital shooters since each frame costs approximately .50-0.75 (film + processing). If you find yourself cropping dramatically on every image, work on your composition in-camera.
Maintaining original aspect ratio (3:2 for 35mm, 6:7 or 1:1 for medium format) preserves the frame relationship your camera saw. Cropping to 16:9 or square changes the fundamental geometry.
Software-Specific Tips
Different editing applications have different strengths for film work.
Adobe Lightroom Classic
Best all-around choice for most film photographers. Catalog system keeps your archive organized. Non-destructive editing means your original scan is never modified. Batch processing applies the same adjustments across an entire roll.
Film-specific workflow tip: Create presets for each film stock you shoot regularly. Not heavy-handed "looks," but starting points that account for each emulsion's typical needs:
- Your Portra 400 preset might set white balance warmer (+200K) and reduce contrast slightly (-5)
- Your HP5 preset might add a touch of clarity (+15)
- Your Ektar preset might reduce saturation slightly (-5) to tame the punch
Fine-tune from there.
Adobe Photoshop
Better for precision retouching than Lightroom. When you have complicated dust removal, blemish work, or selective adjustments that require masking, Photoshop's tools are more powerful.
Film-specific tip: Work on a duplicate layer. Never edit your background layer directly. This gives you undo history beyond Photoshop's limit and lets you compare before/after by toggling layer visibility.
Capture One
Preferred by some professionals for its color editing tools. The Color Editor allows extremely precise adjustments to specific hue ranges without affecting other colors.
Film-specific tip: Use Film Curve profiles if available for your scanner. Capture One has built-in profiles for some scanner models that optimize tonal rendering.
VSCO, RNI, and Film Emulation Presets
These have a place, but be careful. They're designed for digital photos to look like film. Applying "film look" presets to actual film scans usually makes things worse.
If you use presets, look for ones specifically designed for film scans. These typically do less, focusing on optimizing scanning characteristics rather than adding artificial film aesthetics to digital files.
Common Editing Mistakes to Avoid
The Instagram Look
Crushed blacks, lifted shadows, desaturated, heavy vignette. This look works on digital because it gives digital images some character. Applied to film, it removes the character film already has and replaces it with something generic.
Skin Smoothing
Film grain provides a natural texture that's flattering to skin. It softens imperfections without plastic smoothing. When you apply digital smoothing on top, you get the worst of both worlds: artificial smoothness with visible grain artifacts around edges.
HDR Processing
Film's dynamic range is beautiful because it rolls off naturally. Highlights compress gracefully. Shadows fade gently. HDR processing fights against this natural response, trying to force detail everywhere. The results look hyper-real in the worst sense.
Selective Desaturation
That thing where everything is black and white except one red element? Please don't. On any photo. But especially not on film.
Grain Reduction
Noise reduction software can technically reduce grain visibility. But grain is part of film's texture. Removing it makes images look plastic, and the algorithms often struggle to distinguish grain from fine detail, destroying sharpness in the process.
When to Edit More Aggressively
This guide emphasizes restraint, but there are legitimate reasons to push further.
Rescue shots: Badly underexposed (2+ stops under) or color-crossed images might need heavy correction to be usable at all. Getting a somewhat degraded but usable image beats having no image.
Intentional style: Some photographers develop distinctive editing styles as part of their artistic voice. If that's your goal, understand what you're doing and why.
Client requirements: Commercial work sometimes demands specific looks that override naturalistic rendering. Match the brief.
Restoration: Old family photos might need significant intervention to overcome age-related damage. Different goals, different rules.
The point isn't that heavy editing is always wrong. It's that heavy editing as default approach usually produces inferior results with film.
Batch Editing: Consistency Across a Roll
Film shot under consistent conditions can often share a single set of adjustments.
In Lightroom, edit one frame from a roll to your satisfaction. Select that frame plus all others you want to match. Click Sync (or Shift+Cmd/Ctrl+S). Choose which adjustments to sync:
- Usually sync: White Balance, Exposure, Contrast, color adjustments
- Usually don't sync: Cropping, Dust Removal, local adjustments
This gives you consistent look across a roll while still allowing frame-by-frame refinement.
But check results. Light changes. Film base variation exists. A sunny frame and a shaded frame from the same roll don't want identical settings.
The Export Question
After editing, how should you export?
Instagram/Social (Color Space: sRGB) — Format: JPEG, Quality/Size: 80-90%, 2048px long edge
Portfolio website (Color Space: sRGB) — Format: JPEG, Quality/Size: 90%, 2400px long edge
Client delivery (Color Space: sRGB) — Format: JPEG, Quality/Size: 95%, full resolution
Printing (Color Space: Adobe RGB) — Format: JPEG 100% or TIFF, Quality/Size: Full resolution
Archival (Format: Native format + original scan) — Quality/Size: Unchanged For archival: Save your editing software's native format (Lightroom catalog, Photoshop PSD, Capture One session) so adjustments remain editable. Keep original scans unchanged.
Frequently Asked Questions
My lab's scans look flat. Should I add contrast?
Flat scans usually indicate scanner calibration issues or overly conservative color correction by the lab. We recommend talking to your lab first. Properly calibrated professional scanners should produce punchy, vibrant results without requiring heavy editing. At Kubus Photo Service, our Noritsu equipment is calibrated regularly to deliver scans that look good straight from delivery.
How do I match my digital editing style to film?
You probably shouldn't. Film's appeal comes partly from accepting its characteristics. If you want your film to look like your digital work, why not just shoot digital? Let each medium be itself.
Should I edit each frame individually or batch process?
Batch process for baseline adjustments (white balance, exposure). Individual edit for frame-specific issues (dust, cropping, challenging exposures). This balances efficiency with attention to each image's needs.
Can I make film scans look more modern/digital?
Yes, but why? If you want modern/digital looks, shoot digital. Film's value is film's look. Editing away that look defeats the purpose of shooting film.
What about black and white film editing?
BW editing is more forgiving. You're working with tonality only, no color concerns. Contrast adjustments feel more natural. Dodging and burning work beautifully. The danger zone is over-sharpening grain.
Do I need expensive software to edit film scans?
Lightroom (/month with Photoshop) handles 95% of film editing needs. Free alternatives like Darktable work too. Photoshop adds capability for precision work but isn't essential for most workflows.
At Kubus Photo Service, we've been developing and scanning film since 1994. Our Noritsu equipment produces scans that require minimal editing, delivering color and contrast that honors how each film stock is designed to look. Turnaround is 4-6 business days depending on volume, with rush same-day and next-day service available.
Explore our film developing and scanning services to see what we offer, or visit our mail-in film lab page to send film from anywhere. If you're still deciding on scan formats, our guide to JPEG vs TIFF for film scans helps you choose the right option. For understanding resolution options, check out our film scanning resolution guide. Questions about editing or scanning? Contact us or call (718) 389-1339.
Kubus Photo Service is a family-run film lab in Greenpoint, Brooklyn, serving photographers since 1994.
Related Articles
JPEG vs TIFF Film Scans: A Technical Deep Dive for Serious Shooters
The JPEG vs TIFF debate matters more than most photographers realize. After scanning millions of frames since 1994, here's what actually affects your editing flexibility, archive longevity, and print quality.
Film Scanning Resolution Guide: How to Choose the Right Quality for Your Needs
Understanding film scan resolution doesn't require a degree in optics. Here's a practical breakdown of what those megapixel numbers actually mean for your photos.
Film Borders and Sprocket Hole Scanning: When to Include the Rebate
Scanning film with borders reveals frame numbers, manufacturer codes, and sprocket holes. Learn the technical requirements, aesthetic considerations, and how to request border scans from your lab.
Ready to Develop Your Film?
We're a family-run film lab in Greenpoint, Brooklyn, developing film since 1994. Whether you drop off in store or mail your rolls from anywhere in the US, we treat every frame with care.
How to Mail In Film for Developing: Complete Step-by-Step Guide
Learn exactly how to safely mail your film for professional developing. Step-by-step guide covering packing, shipping options, what to expect, and how to get the best results from a professional film lab.
Read the Complete Guide