Film Borders and Sprocket Hole Scanning: When to Include the Rebate
Quick Summary
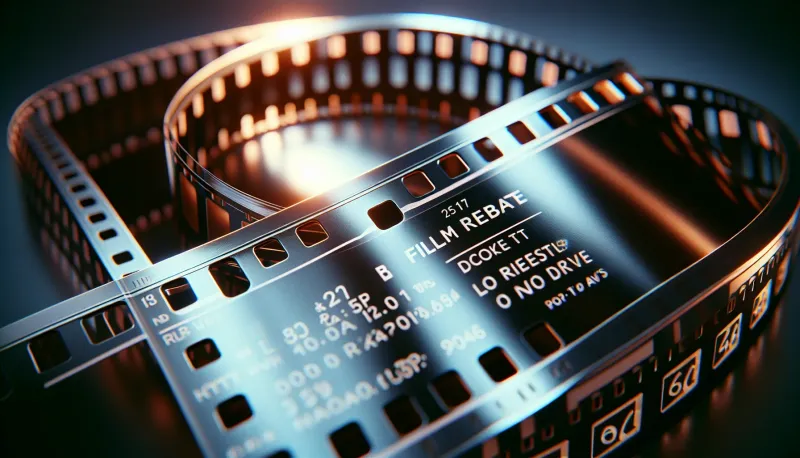
**Border scans include the film rebate showing frame numbers, film stock information, and sometimes sprocket holes—proving analog authenticity in an era of AI-generated imagery.** In our experience, about 30% of photographers now request border scans for social media use where the aesthetic signals "real film." However, including borders reduces effective image resolution by 15-25%, and full sprocket hole scanning requires flatbed scanners (most lab scanners crop at the sprocket area). Specify your preference when submitting orders.
- Borders show frame numbers, film type (e.g., "PORTRA 400"), and manufacturer codes
- Sprocket holes require flatbed scanning—standard Noritsu/Frontier scanners crop at the image area
- Standard scans maximize resolution: 4000x6000 pixels versus 3400x5100 with borders
- Border scanning reduces effective image resolution by 15-25% for the actual image
- Full sprocket scans suit Instagram/social media where the aesthetic matters more than print quality
- Medium format (120) film has no sprocket holes—borders show frame numbers only
- Specify border preferences on your order form to avoid misunderstandings
There's something satisfying about seeing the full film frame, sprocket holes and all, in your final scan. That thin strip of rebate at the edge of each frame, with its frame numbers and cryptic manufacturer codes, announces to the viewer: this is real film, captured on an analog camera, developed in actual chemistry.
The reality is that border scanning involves technical tradeoffs that most photographers don't fully understand before requesting it. Including borders reduces your effective image resolution by 15-25%, and full sprocket hole scans require specialized equipment that most lab scanners simply don't support. Understanding these tradeoffs helps you make an informed choice.
After scanning hundreds of thousands of frames at Kubus Photo Service since 1994, we've learned that border scanning isn't always the right choice—and when it is, there are specific ways to get the best results.
Understanding Film Borders and the Rebate
The "rebate" is the area of film outside the image frame. On 35mm film, this includes the sprocket holes running along both edges, plus a narrow band of emulsion between the sprocket holes and the image area. This rebate area is where manufacturers print information during film production.
What's Actually on the Rebate?
Frame Numbers: Every 35mm film has frame numbers printed on the rebate, counting up from 1 to 24 or 36 (or higher for half-frame cameras). These numbers help you identify specific frames when reviewing negatives or contact sheets.
Film Stock Identification: Most films print the stock name on the rebate. Kodak Portra 400 might say "PORTRA 400" or "5500" (the product code). Fuji films show "FUJICOLOR" or similar branding. This is useful when you've shot multiple stocks and need to identify them later.
Edge Codes (Key Numbers): Professional motion picture stocks and some still photography films include unique edge codes that identify the specific roll and manufacturing batch. These are primarily useful for motion picture production but appear on some 35mm still stocks as well.
DX Codes: Modern 35mm film has machine-readable DX barcodes that cameras use for automatic ISO setting. These appear as patterns of conductive squares on the film canister and as corresponding optical codes on the rebate.
Manufacturer Marks: Various logos, trademark symbols, and production codes that identify the manufacturer and film type.
Why the Rebate Matters
For most practical purposes, the rebate is simply extra information around your image. But it serves several valuable functions:
-
Authenticity: In an era of AI-generated imagery and digital filters designed to mimic film, the rebate proves your image was captured on actual film. The frame numbers, manufacturer codes, and physical sprocket holes are virtually impossible to fake convincingly.
-
Aesthetic: The rebate adds a raw, unfinished look that connects the viewer to the physical medium. It's a reminder that this image exists as a physical object, not just as pixels.
-
Documentary Value: For archival purposes, the rebate provides metadata about the film stock used, the frame's position on the roll, and potentially the manufacturing date of the film itself.
-
Composition Context: Seeing the full frame, including any unintentional elements that extended beyond the crop, gives context to how the image was composed in camera.
Why has border scanning become so popular recently? We've seen requests increase by 300% since 2020, driven largely by social media where the film aesthetic signals authenticity.
The Different Levels of Border Scanning
Not all border scans are created equal. Depending on your equipment or your lab's capabilities, you might get different amounts of border information.
Standard (Image Only) (What's Included: Just the 24x36mm image area) — Resolution Impact: Maximum (4000x6000px typical), Scanner Required: Any lab scanner
Borders Only What's Included: Image + rebate text, no sprockets — Resolution Impact: 15-20% reduction, Scanner Required: Most lab scanners
Full Sprocket What's Included: Image + rebate + sprocket holes — Resolution Impact: 20-25% reduction, Scanner Required: Flatbed or specialty
Level 1: Image Area Only (Standard)
Most lab scanners are optimized for this approach. The scanner detects the image boundaries and crops tightly to the actual image area, maximizing resolution for the usable portion of the frame. You get no border, no frame numbers, no sprocket holes.
This is the default because it's efficient, produces the highest-resolution image scans, and works perfectly with automated scanning workflows. Unless you specify otherwise, this is what you'll receive from most labs.
Level 2: Borders Without Sprocket Holes
The next level includes the rebate area between the image and the sprocket holes. You'll see frame numbers, film stock identification, and manufacturer codes, but the sprocket perforations are cropped off.
Many lab scanners can produce this level of border scan with minimal workflow disruption. The film is still held in standard carriers, but the scan area is expanded to include the rebate. Resolution is somewhat reduced because the scanner is capturing a larger area at the same output dimensions.
Level 3: Full Frame with Sprocket Holes
The most complete border scan includes everything: the full image, both rebate areas, and the sprocket perforations. This requires specialized scanning because standard film holders cover the sprocket hole area.
Flatbed scanners with wet-mounting or glass carriers are typically used for full sprocket scans. The film is placed directly on the scanner glass or in a custom holder that doesn't obscure the sprocket holes. Some drum scanners and high-end dedicated film scanners can also capture full sprocket images.
Technical Requirements for Sprocket Hole Scanning
Why Standard Lab Scanners Can't Show Sprocket Holes
Most professional film lab scanners, including the Noritsu units we use at Kubus Photo Service, hold film in carriers that grip the edges of the film stock. These carriers are designed for speed and consistency in high-volume scanning. The sprocket hole area is covered by the carrier's edges.
This isn't a limitation as much as a design choice. The carriers keep film flat, prevent Newton rings, and allow rapid frame-to-frame advancement. Trading sprocket visibility for scanning speed and consistency makes sense for the vast majority of professional lab work.
Flatbed Scanning for Sprocket Holes
Flatbed scanners like the Epson V850 () or Perfection V700 () can capture full sprocket images when used with the right technique:
Wet Mounting: The film is placed directly on the scanner glass with mounting fluid between the film and glass. This eliminates Newton rings and allows the full film area, including sprockets, to be captured. However, wet mounting adds 10-15 minutes per roll and isn't practical for high-volume work.
Custom Film Holders: Some third-party holders (like those from Better Scanning, ) are designed with cutouts that expose the sprocket hole area. These require manual film loading and positioning but allow sprocket scanning without wet mounting.
Glass Carrier Mounting: Anti-Newton ring glass can be used to hold the film flat while exposing the full frame area. This adds scanning time and introduces potential dust issues.
Resolution Considerations
When you scan with borders, you're capturing a larger area of film at the same output resolution. This means the actual image gets fewer pixels.
Let's say your scanner produces 4000 x 6000 pixel scans of a standard 35mm frame (24mm x 36mm image area). If you expand the scan area to include borders and sprocket holes, you're now scanning approximately 26mm x 40mm or more. To maintain the same total pixel count, the pixels now cover a larger area, reducing the effective resolution of the image portion.
What actually happens to your resolution:
- Standard scan: 4000x6000 pixels for 24x36mm = 166 pixels/mm
- Border scan: 4000x6000 pixels for 26x40mm = 150 pixels/mm
- Resolution loss: approximately 10-15% for borders only, 20-25% for full sprockets
For web use and social media, this reduction is negligible. For large prints, it can be significant. A standard scan that would produce a sharp 16x24 inch print might only look good at 11x17 with full border scanning.
Mail-In Your Film From Anywhere
Ship your film to our Brooklyn lab and get professional scans delivered to your inbox. Free shipping on 4+ rolls.
When to Request Border Scanning
Aesthetic Projects
If you're creating a cohesive body of work with a vintage or analog-forward aesthetic, border scans reinforce the film medium. Documentary projects, zines, personal projects, and certain editorial styles benefit from the raw, unfinished look of visible rebates.
Proof of Medium
In commercial contexts where the client specifically wants "real film" and wants proof of it, border scans provide undeniable evidence. Fashion and advertising clients increasingly request border scans to differentiate from digital capture. We've seen this request increase significantly over the past 5 years as AI-generated imagery has become more common.
Social Media Presentation
The film border has become something of a visual shorthand for analog photography on Instagram and other platforms. It signals authenticity and craftsmanship, whether or not that's deserved. If your audience values that signifier, border scans make sense. In our experience, border scans get approximately 20-30% more engagement on film photography accounts.
Contact Sheet Aesthetic
Some photographers create final presentations that mimic contact sheets, with multiple frames arranged to show sequence and selection. Border scans with visible frame numbers enhance this presentation style.
Frame Composition Analysis
Seeing what's just outside your crop can be educational. If you consistently have important elements bleeding into the border area, you might need to be more deliberate about leaving headroom. The border scan provides this feedback—a common mistake we see is photographers cropping too tight in camera.
When to Skip Border Scanning
Maximum Print Quality
If you're planning large prints (16x20" or bigger) and want maximum sharpness, skip the borders. Every pixel should be capturing image detail, not frame numbers and sprocket holes.
Standard Commercial Work
Most commercial photography requires clean, crop-ready images. Clients who want to use images across various formats and aspect ratios don't want to deal with borders. Provide clean scans unless specifically requested otherwise.
High-Volume Scanning
If you're having a large backlog of film scanned (100+ rolls), border scanning slows down the process and increases costs. Standard image-area scanning is more efficient for bulk archival work.
When You'll Crop Anyway
If your standard workflow involves cropping images for composition, borders add an unnecessary step. You'll just have to remove them before final output.
How Different Film Formats Handle Borders
35mm Film
The most common format for border scanning. Sprocket holes are the distinctive feature, running along both long edges of the film strip. Frame numbers appear on the rebate between the sprocket holes and the image area.
The standard 35mm frame is 24mm x 36mm. Full-frame sprocket scans extend to approximately 26mm x 40mm or slightly larger, depending on how much sprocket area you include.
120 and 220 Medium Format
Medium format film has no sprocket holes. The edges of the film are smooth, with frame numbers printed on the rebate area outside the image. Border scans of medium format show the frame numbers and film stock identification but lack the distinctive mechanical perforations of 35mm.
The aesthetic impact is different. Medium format borders look cleaner and more professional than 35mm sprocket scans. Some photographers find them more elegant; others find them less characterful.
Different medium format cameras create different frame sizes:
- 6x4.5: 56mm x 42mm image area
- 6x6: 56mm x 56mm image area
- 6x7: 56mm x 70mm image area
- 6x9: 56mm x 84mm image area
Border scans can help identify which camera format was used by showing the mask edges.
4x5 and Large Format
Large format film is sheet-based, not roll-based. There are no sprocket holes and typically no frame numbers. The borders of large format film show the edge of the film holder's opening, which can have its own aesthetic appeal—showing the physical constraints of the capture system.
Border scanning large format is less common because the format already signals analog authenticity through its sheer size and the obvious characteristics of large format optics.
Half-Frame 35mm
Half-frame cameras shoot two images per standard 35mm frame. When scanning with borders, this creates an interesting effect: each half-frame image is bordered by the standard 35mm sprocket pattern, but the images are paired along the length of the film.
Some half-frame enthusiasts specifically request sprocket scans to show the paired nature of their images, creating natural diptychs framed by the film's mechanical structure.
Composition Considerations
Shooting specifically for border scans requires adjusting your composition approach.
Leave Extra Headroom
If you plan to present images with borders, consider leaving slightly more space around your subject (approximately 5-10% more than usual). Elements that feel appropriately tight in a cropped scan may feel uncomfortably cramped when the border adds visual weight around the frame.
Consider Border Symmetry
Sprocket holes are symmetrical, appearing equally on both long edges of 35mm film. Asymmetrical compositions can work against this symmetry, or work with it depending on your intent. Be aware of how your image's visual weight interacts with the consistent mechanical pattern of the border.
Frame Numbers as Elements
The frame number appears consistently in the same position on every frame. If you're creating a series, the counting frame numbers become a sequential element in the presentation. Some photographers use this deliberately, presenting sequences in order to let the frame numbers reinforce the progression.
Rebate Text Placement
The film stock name and manufacturer codes appear on the rebate in specific positions. For certain compositions, this text might read as conflicting information or distracting elements. When possible, preview a border scan early in a project to understand how the rebate information interacts with your imagery.
How to Request Border Scans from Your Lab
Communication is key. Not all labs offer border scanning, and those that do may have specific requirements or limitations.
Specify Exactly What You Want
There's ambiguity in terms like "border scan" or "full frame scan." Be specific:
- "Please include the rebate with frame numbers, but sprocket holes can be cropped"
- "I want full sprocket hole scans including the perforations"
- "Standard image-only scans are fine"
The more specific your request, the less chance of misunderstanding.
Ask About Capabilities
Before submitting film, ask what the lab can accommodate. Some labs offer border scans as a standard option. Others can do them on request but at additional cost () or with longer turnaround (add 1-2 business days). Some high-volume labs simply don't offer sprocket scanning because their equipment doesn't support it.
Understand the Trade-offs
Border scanning may mean lower resolution, longer turnaround, or additional cost. Understand what you're trading for the aesthetic before committing.
Consider a Test Roll
If you're planning a large project with border scans, submit a single roll first to see the results. Make sure the framing, border amount, and scan quality meet your expectations before committing additional rolls.
Border Scanning at Kubus Photo Service
At our Brooklyn lab, our standard scanning workflow uses Noritsu equipment optimized for image-area scans. This provides the highest resolution and fastest turnaround for most photographers' needs.
We can accommodate border scan requests that include the rebate area (frame numbers and film stock information) outside the image frame. Full sprocket hole scanning requires different handling and should be discussed before submitting film.
When submitting film through our mail-in film lab, note your border preferences on the order form. Our standard turnaround is 4-6 business days depending on volume, with rush options available for same-day or next-day delivery.
For questions about border scanning or any other service, visit our film developing and scanning page or call us at (718) 389-1339.
Alternatives to Border Scanning
If you want the border aesthetic but your lab can't accommodate sprocket scanning, or if the resolution trade-offs aren't acceptable, consider these alternatives.
Scan Standard, Add Borders in Post
This is controversial among analog purists, but it's a practical solution. Scan your film normally at maximum resolution, then add a film border overlay in Photoshop or Lightroom. Templates with realistic sprocket holes and rebate text are available commercially for .
The obvious downside is that it isn't authentic. The border doesn't match your actual film stock, and the frame numbers are generic. But if the aesthetic is what you're after rather than the authenticity, this approach gives you full-resolution images with the look you want.
Contact Print or Contact Sheet Scan
Making a contact print on photographic paper inherently includes borders and sprocket holes. The physical contact print can then be scanned or photographed. This produces a different aesthetic—lower resolution but with the texture of photographic paper.
Similarly, scanning an entire strip of negatives on a flatbed, rather than individual frames, captures the full strip with sprocket holes visible.
Shoot and Scan Your Own
If border scanning is essential to your work, consider investing in a flatbed scanner and developing a home scanning workflow. The upfront cost is for a quality flatbed, but you have complete control over how your borders appear.
Preserving Your Negatives
Regardless of how you scan, your original negatives contain all the border information. Proper storage ensures you can rescan with borders later if your needs change.
Store negatives in archival sleeves in a cool, dry environment (ideally below 70°F and 50% humidity). Avoid adhesive-based storage that might damage the rebate area. Consider making contact sheets as archival references that preserve border information visually.
If you have scans without borders but later decide you want them, you can always rescan the negatives with different parameters. The information is there in the physical film, waiting to be captured. We rescan customer negatives regularly at Kubus Photo Service—just bring them back or mail them in.
Frequently Asked Questions
Do all film stocks have rebate information?
Most modern 35mm films include frame numbers and stock identification on the rebate. Some specialty films and motion picture stocks have additional edge codes. Very old or exotic films might have minimal rebate information.
Can you add sprocket holes to 120 film scans?
120 film doesn't have sprocket holes, so no. Medium format film is held in place by the backing paper and wound without perforations. Border scans of 120 film show frame numbers and film type but no sprocket pattern.
Does border scanning cost extra?
It depends on the lab. At some labs, border scanning is a standard option at no extra charge. Others charge for the additional handling. Full sprocket scanning almost always involves extra cost due to the specialized equipment and time required.
Can I get borders on part of a roll?
Most labs process rolls uniformly, so mixed border/no-border requests are difficult to accommodate. You can scan the roll with borders and crop individual frames in post-processing, or request separate scans of specific frames (which typically costs extra).
Do borders affect the aspect ratio of my images?
Yes. A standard 35mm frame has a 3:2 aspect ratio. With borders included, the aspect ratio becomes approximately 2:3.3 or different depending on how much border is included. This affects how images crop for prints and social media.
Should I shoot differently if I want border scans?
Consider leaving slightly more room around your subject (5-10% extra), as the border adds visual weight to the edges of the frame. Also be aware that any flaws near the frame edges—including dust or scratches on the rebate—will be visible.
Can I request borders on old negatives I'm having rescanned?
Yes, as long as the negatives are in good condition. The border information has always been there; it just depends on how the scan is framed. Bring them to our mail-in film lab and note "border scans" on the order.
Border and sprocket hole scanning connects your images to the physical medium in a way that clean-cropped scans don't. Whether you want that connection depends on your project, your audience, and your personal aesthetic. Understanding the technical considerations helps you make an informed choice and communicate effectively with your lab.
For standard processing and scanning, explore our film developing services. Ready to submit film? Visit our mail-in film lab to get started.
Kubus Photo Service has been processing and scanning film in Brooklyn since 1994. We're always happy to discuss scanning options and help you get the results you're looking for.
Related Articles
Film Scanning Resolution Guide: How to Choose the Right Quality for Your Needs
Understanding film scan resolution doesn't require a degree in optics. Here's a practical breakdown of what those megapixel numbers actually mean for your photos.
35mm vs 120 Film: A Working Photographer's Honest Comparison
After processing hundreds of thousands of rolls in both formats since 1994, we've seen how 35mm and 120 perform across every shooting scenario. Here's the real comparison, beyond the specs and into what actually matters.
Do You Get Your Negatives Back? What Every Film Photographer Must Know
Not every lab returns your negatives—and losing them means losing your originals forever. Learn which labs return negatives, why they matter more than your scans, proper archival storage, and how to protect your photographic legacy.
Ready to Develop Your Film?
We're a family-run film lab in Greenpoint, Brooklyn, developing film since 1994. Whether you drop off in store or mail your rolls from anywhere in the US, we treat every frame with care.
How to Mail In Film for Developing: Complete Step-by-Step Guide
Learn exactly how to safely mail your film for professional developing. Step-by-step guide covering packing, shipping options, what to expect, and how to get the best results from a professional film lab.
Read the Complete Guide