Wedding Disposable Cameras: The Complete Planning, Placement, and Developing Guide
Quick Summary
Plan 1 disposable camera per 2-3 guests, placed on tables after dinner service begins. In our experience processing thousands of wedding batches since 1994, the key factors are instruction cards emphasizing flash use and close distances (4-8 feet), plus assigning someone to actively collect cameras during the final reception hour. Expect approximately 10-20% keeper rate from exposed frames—but those 20-50 genuinely special candid moments are worth the entire investment.
- Budget 1 camera per 2-3 guests (40 cameras for 100 guests, ~ for cameras)
- Best placement: tables, bar area, near dessert - never ceremony seats or kids' tables
- Assign one dedicated person to actively collect cameras during the last hour
- Instruction cards emphasizing flash activation and close distances improve results by 30-40%
- Professional developing per camera vs. at drugstores
- Expect 20-50 genuinely special images from a typical 40-camera wedding batch
- Develop within 2-3 months for best color accuracy
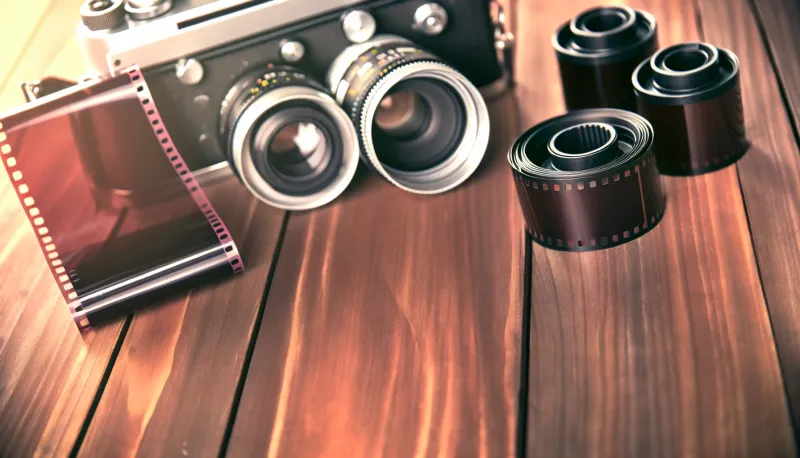
Wedding disposable cameras capture the candid, unscripted moments your professional photographer can't be everywhere to catch. They occupy a peculiar space in modern photography—they produce technically inferior images compared to your professional photographer's mirrorless setup, yet the photos they capture often become the most treasured from the entire day. Why is that? There's something about the combination of guest perspective, analog unpredictability, and candid timing that creates genuinely irreplaceable moments.
We've processed thousands of wedding disposable camera rolls at our Brooklyn lab since 1994, and the pattern holds: among the blurry shots and thumb-covered frames, there are always a handful of images that make couples tear up. The grandmother dancing with the flower girl. The groomsmen's genuine reactions during the vows. The stolen kiss nobody else saw. Your professional photographer captures the planned moments beautifully. Your guests capture the unscripted ones.
This guide covers everything you need to know about planning, placing, collecting, and developing wedding disposable cameras. The goal is simple: maximize your chances of capturing those irreplaceable candid moments while minimizing the common pitfalls that waste film and frustrate couples.
Understanding What Disposable Cameras Actually Deliver
Before diving into logistics, let's establish realistic expectations. Disposable cameras use fixed-focus lenses (typically focused at about 4-6 feet), single-speed shutters (around 1/100 second), and built-in flash units with limited range (about 4-10 feet). The film inside is usually ISO 400 or 800, which handles indoor reception lighting reasonably well but isn't designed for artistic bokeh or precise exposure control.
What does this mean practically?
They excel at:
- Close-range candid shots of people (4-8 feet distance)
- Table photos with guests at the same table
- Dance floor moments within flash range
- Outdoor daytime shots
- Spontaneous group selfies
- Genuine emotional reactions
They struggle with:
-
Anything beyond 10 feet away
-
Low-light scenes without flash
-
Fast motion (shutter speed is only 1/100)
-
Artistic composition
-
Precise framing
-
Subjects against bright windows
Understanding these limitations helps you set placement strategies and guest instructions that work with the camera's strengths rather than against them.
How Many Cameras Do You Actually Need?
The classic formula suggests one camera for every 2-3 guests. This works as a starting point, but actual needs vary based on several factors.
Base Calculation
50 guests (Minimum Cameras: 17 cameras) — Maximum Cameras: 25 cameras, Total Potential Exposures: 459-675 frames
75 guests (Minimum Cameras: 25 cameras) — Maximum Cameras: 37 cameras, Total Potential Exposures: 675-999 frames
100 guests (Minimum Cameras: 33 cameras) — Maximum Cameras: 50 cameras, Total Potential Exposures: 891-1,350 frames
150 guests (Minimum Cameras: 50 cameras) — Maximum Cameras: 75 cameras, Total Potential Exposures: 1,350-2,025 frames
200 guests (Minimum Cameras: 67 cameras) — Maximum Cameras: 100 cameras, Total Potential Exposures: 1,809-2,700 frames
Adjusting for Your Specific Event
Go higher when:
- Your reception runs 5+ hours (more opportunities, more exposure)
- Your crowd trends younger and more social-media-oriented
- You're having multiple venues or locations throughout the day
- Cocktail hour and reception are in different spaces
- You want cameras at both ceremony and reception
You might go lower when:
- Reception is shorter (3-4 hours)
- Guest list skews older and less photography-inclined
- You're on a tight budget and willing to accept fewer overall shots
- You're having a smaller, intimate gathering where cameras might feel intrusive
The Math Behind the Madness
A standard disposable camera contains 27 exposures. If you have 100 guests and 40 cameras, that's 1,080 potential exposures. In our experience processing wedding batches, expect roughly:
- 60-70% of frames to be exposed (some cameras don't get fully used)
- 30-40% of exposed frames to be technically acceptable
- 10-20% of acceptable frames to be genuinely compelling
For 100 guests with 40 cameras, that translates to approximately 650-750 exposed frames, 200-300 acceptable images, and 65-150 keepers. Those keeper numbers might seem low, but remember: you only need a dozen truly special candid moments to make the entire investment worthwhile.
Selecting the Right Cameras
Not all disposable cameras perform equally. We've seen the differences firsthand over 30 years of processing. The internal film stock, flash reliability, and lens quality vary significantly between brands.
Recommended Options
Kodak FunSaver (27 exposures) - each: Our top recommendation for weddings. The film inside is actual Kodak Gold 800, which handles mixed lighting well and produces those warm, nostalgic tones that complement wedding photography. Flash is reasonably powerful (effective to approximately 10 feet), and the viewfinder is more accurate than cheaper alternatives. Consistent results across thousands of units we've processed.
Fujifilm QuickSnap Flash 400 (27 exposures) - each: Solid alternative with slightly cooler tones than Kodak. The flash tends to be marginally less powerful (effective to approximately 8 feet), so results in darker venues may show more underexposure. Still a reliable choice, especially if you prefer Fuji's color science.
Ilford HP5 Plus Single Use Camera (27 exposures) - each: For couples wanting black-and-white guest photos. The HP5 film inside is genuinely excellent, and black-and-white processing is more forgiving of exposure mistakes. Creates a distinctive aesthetic that separates guest photos from your color professional photography.
What to Avoid
Off-brand bargain disposables (you've seen them at dollar stores for ) use lower-quality film, less reliable flash units, and cheaper plastic lenses. The price difference is typically per camera, but the failure rate and image quality degradation aren't worth the savings. When you're already investing in developing dozens of cameras, skimping on the cameras themselves makes little sense.
Also avoid expired disposables. Unlike professional film shooters who intentionally use expired stock for creative effects, expired disposable cameras often have degraded batteries (weak flash) and unpredictable film shifts. For an event as important as a wedding, fresh stock is worth the peace of mind.
Mail-In Your Film From Anywhere
Ship your film to our Brooklyn lab and get professional scans delivered to your inbox. Free shipping on 4+ rolls.
Strategic Placement: Where Cameras Belong
Placement strategy dramatically affects both participation rates and image quality. What's the point of buying 40 cameras if half of them sit unused? Poorly placed cameras get ignored; well-placed cameras get used.
Reception Tables: The Primary Location
Most couples place cameras on dining tables, which makes sense—guests sit there for extended periods and have time to notice and use the cameras. But specific placement matters:
- Position cameras at eye level. If your centerpieces are tall, place cameras to the side rather than behind them. A camera hidden behind a floral arrangement gets forgotten.
- One camera per table, maximum two. More cameras per table doesn't increase usage proportionally; it just means more unexposed film. One camera creates slight "competition" that actually encourages use.
- Place cameras after the meal service begins. Cameras set out during cocktail hour while tables are empty often get moved, knocked over, or pocketed before guests arrive. Have staff or your wedding coordinator place cameras just as guests move to their tables.
High-Traffic Secondary Locations
The bar area: People loosen up at the bar. Place 2-4 cameras in visible spots near the bar, not behind it where only bartenders see them. Bar photos tend to capture the most animated, genuine expressions of the night.
Photo booth vicinity: If you have a photo booth, place a few disposables nearby. Guests are already in photography mode, and the disposable offers a different aesthetic than the booth.
Dessert or cake table: The cake cutting draws attention, but the scattered moments around dessert—kids sneaking extra cookies, couples feeding each other bites—make great candid fodder.
Near the exit or gift table: Catch people coming and going. End-of-night shots often capture the happy exhaustion and genuine emotion of guests saying goodbye.
Where NOT to Place Cameras
Ceremony seats: This seems intuitive, but cameras at the ceremony are problematic. Guests feel awkward taking photos during vows, flash disrupts the mood and your photographer's work, and the distance to the couple usually exceeds the flash range. Save cameras for the reception.
Children's tables: Kids under 10 will shoot an entire roll in three minutes, mostly of their fingers, the floor, or each other making faces. Unless you want 27 exposures of seven-year-old chaos per camera, keep disposables at adult tables.
Outdoor locations with direct sunlight: If your reception includes outdoor spaces in bright sun, disposables there tend to produce washed-out, overexposed results. The fixed exposure settings handle shade and indoor lighting better than harsh direct sun.
Guest Instruction Cards: Worth the Effort
A simple instruction card with each camera significantly improves image quality. Without guidance, well-meaning guests make easily avoidable mistakes.
What to Include
Flash reminder: The single most common mistake is forgetting to turn on the flash indoors. Make this the most prominent instruction: "Turn on the flash for indoor shots." Point out where the flash switch is located.
Distance guidance: Explain that subjects should be 4-8 feet away for best results. "Get close! The flash works best within arm's reach." This prevents the distant, dark reception hall shots that plague every wedding batch.
Lens and flash clearance: "Keep fingers away from the lens (front) and flash (top)." You'd be shocked how many frames are ruined by partial finger coverage—we see this on approximately 15-20% of wedding disposable frames.
Photo prompts: Give guests ideas beyond "take pictures of each other." Examples:
- Capture something that makes you smile
- Photograph your favorite detail in the room
- Take a selfie with someone you just met tonight
- Snap someone caught mid-laugh
- Photograph what's on your plate
Return instructions: "Please return cameras to [specific location] before you leave." This is crucial for collection.
Keep It Short
Your card should be readable in 10 seconds. A paragraph is fine; an essay gets ignored. Use bullet points, simple language, and maybe one tiny decorative element that matches your wedding aesthetic.
Collecting Cameras: The Critical Step
This is where most wedding disposable camera plans fail. Without a specific collection strategy, cameras walk out the door in purses and jacket pockets. Some guests genuinely intend to return them later (they rarely do). Others assume the camera is a favor to keep.
Assign a Dedicated Collector
Choose one trusted person—a bridesmaid, family member, or wedding coordinator—whose sole responsibility during the final reception hour is collecting cameras. Give them a basket or bag and clear instructions:
- Start collecting one hour before the scheduled end time
- Visit every table and specifically ask for cameras
- Check the bar, photo booth area, and other secondary locations
- Don't be shy about asking guests directly
This single step recovers more cameras than any other intervention. In our experience, a dedicated person with a basket dramatically outperforms a passive drop-off box alone—typically recovering 85-95% of cameras versus 50-60% with a box alone.
Create a Visible Return Station
In addition to active collection, set up a decorated return box near the exit or gift table. Some guests will proactively return cameras here, especially if:
- The box is clearly labeled ("Return Disposable Cameras Here")
- It's visually distinctive and matches your wedding decor
- It's positioned somewhere guests naturally pass when leaving
The combination of active collection plus passive return station captures the maximum number of cameras.
Morning-After Sweep
Even with diligent collection, some cameras hide under tablecloths, behind centerpieces, or in forgotten corners. If your venue allows, do a quick sweep the morning after (or have your coordinator do it). We've seen couples recover 5-10 additional cameras this way.
Storage Before Developing
Weddings typically happen on weekends, and couples often leave immediately for honeymoons. Your cameras may sit for days or weeks before reaching the lab. Proper storage preserves image quality.
Short-Term Storage (Days to Weeks)
Keep cameras in a cool, dry location away from direct sunlight. A closet or drawer at room temperature (65-75°F) works fine. Avoid:
- Hot cars (film degrades rapidly above 80°F)
- Humid basements (moisture affects both film and camera electronics)
- Direct sunlight (accelerates film degradation)
- Near heat sources (radiators, heating vents)
Longer-Term Storage (Months)
If you won't be developing for a month or more, refrigeration extends film life. Place cameras in a sealed plastic bag to prevent moisture condensation, then store in the refrigerator (not freezer). Allow cameras to return to room temperature (approximately 1-2 hours) before sending them for processing, to avoid condensation issues.
Ideal Developing Timeline
For best results, develop within 2-3 months of exposure. The latent image on film slowly degrades over time, and colors can shift. We've successfully developed disposable cameras from weddings years ago, but fresher is better.
Professional Developing: Why It Matters for Wedding Photos
You can technically develop disposable cameras anywhere that processes C-41 film. CVS, Walgreens, and various drugstores still accept them. But wedding disposable cameras present specific challenges that professional film labs handle better.
The Problem with Mass Processing
Drugstore film processing uses automated equipment with minimal human oversight. The machines are calibrated for "average" exposures and make automatic corrections based on algorithms. This works fine for well-exposed daylight shots but fails spectacularly with:
Underexposed reception shots: Indoor wedding lighting typically measures 2-4 stops below outdoor daylight. Automated systems either leave these too dark or overcorrect into muddy, grainy messes.
Mixed lighting: Reception venues combine tungsten, fluorescent, LED, candles, and sometimes colored accent lighting. Automated color correction struggles with these combinations.
Flash variations: Disposable camera flash exposure varies based on battery strength, distance, and ambient light. Each frame may need different correction.
What Professional Labs Do Differently
At Kubus Photo Service, we approach wedding disposables knowing that every frame is a potential treasure hiding among technical imperfection. Our film developing and scanning services include:
- Individual frame assessment: We scan each frame and adjust exposure, color balance, and density based on what that specific image needs, not what an algorithm guesses.
- Recovery of underexposed frames: Our Noritsu HS-1800 scanner extracts shadow detail that automated systems miss. That dark dance floor shot often contains a usable image with proper scanning.
- Consistent color across varying conditions: We balance warm tungsten, cool flash, and mixed lighting to produce natural skin tones throughout your batch.
- Dust and scratch attention: Disposable camera film gets handled roughly. We address dust and minor scratches during scanning.
For couples outside Brooklyn, our mail-in film lab service makes professional processing accessible from anywhere. Pack your cameras securely, ship them to us, and we return your developed negatives along with high-quality digital scans.
What to Expect: Turnaround and Cost
We complete most standard orders in 4-6 business days, depending on volume. Wedding batches with dozens of cameras naturally take longer than a single roll. If you're on a tight timeline—maybe you want to include some guest shots in thank-you cards—ask about rush options for same-day or next-day turnaround.
Typical cost breakdown:
- Professional developing and scanning: per camera
- 40-camera wedding batch: approximately total
- High-resolution scans: add per camera
- Rush processing: add 50% to standard pricing
Processing Your Results: What to Expect
When you receive your scans, prepare for a mixed bag. This is normal and expected.
Typical Hit Rates
From a batch of 40 cameras (approximately 1,080 potential exposures):
- 650-750 frames will be exposed
- 100-150 will be technically unusable (severe blur, completely black, pure flash reflection)
- 400-500 will be mediocre but recognizable
- 100-150 will be solid, printable images
- 20-50 will be genuinely special keepers
Those 20-50 special frames are why you did this. The candid laugh, the unexpected embrace, the moment your photographer missed because they were getting group shots in another room.
Curating Your Collection
Resist the urge to share everything. A curated selection of 30-50 great images has far more impact than a dump of 500 mediocre ones. When reviewing:
- Pull the obvious winners first
- Look for storytelling images that complement your professional photos
- Include a few "imperfect" shots that capture genuine emotion
- Delete the obvious failures (pure black, pure flash, total blur)
- Be ruthless about the mediocre middle—it adds bulk without value
Creating a Guest Photo Album
Consider making a separate album or slideshow specifically from guest disposable photos. This distinguishes them from your professional photography while honoring the contribution. A simple chronological arrangement, or grouping by table/location, creates a narrative.
Common Problems and Solutions
Over three decades of processing wedding disposables, we've seen every possible issue. Here are the most common and how to address them:
Flash Not Activated
Symptom: Completely dark indoor shots, sometimes with faint ghostly figures.
Cause: Guest didn't turn on the flash or assumed it fired automatically.
Prevention: Instruction cards emphasizing flash activation. Some couples pre-turn-on every flash before placing cameras (though batteries do drain slightly while waiting—approximately 5-10% over 6 hours).
Recovery: Professional scanning can sometimes pull detail from severely underexposed frames, but truly black frames are unrecoverable.
Severe Motion Blur
Symptom: Smeared subjects, light trails from movement.
Cause: Camera shake during exposure (1/100 second is slow for unsteady hands after champagne).
Prevention: Instruction to hold camera with both hands and stay still until flash fires.
Recovery: Limited. Some blur can be acceptable for "artistic" effect, but severe camera shake is difficult to address in post.
Finger Over Lens
Symptom: Dark blob covering part of the frame, often with fingerprint texture visible.
Cause: Finger positioned over the lens during exposure.
Prevention: Instruction cards noting lens location. Some disposables have raised ridges to prevent this.
Recovery: None for the covered portion. If the important subject is in the clear area, crop aggressively.
Subject Too Far Away
Symptom: Tiny figures in vast dark space, well-lit but impossibly small.
Cause: Guest tried to photograph something 20+ feet away with a flash effective to 10 feet.
Prevention: Instruction cards emphasizing that subjects should be within arm's reach.
Recovery: Cropping helps somewhat, but the resolution of disposable camera film limits enlargement.
Double Exposures
Symptom: Two overlapping images on one frame.
Cause: Disposable camera film advance failed (rare but happens with rough handling).
Prevention: Not preventable by users.
Recovery: Sometimes creates interesting accidental art. Otherwise, neither image is fully salvageable.
Alternatives and Complements
Disposable cameras aren't the only option for capturing guest perspectives. How do alternatives compare?
Instant Cameras (Instax, Polaroid)
Pros: Immediate physical prints, no developing wait, guests can see results instantly.
Cons: Higher cost per image (.75-1.50 per shot vs. .50-0.75 for disposables), prints are the only copy (no negatives to rescan), image quality is lower than developed disposable photos.
Complement: Consider a single instant camera station for immediate gratification while using disposables for the archival collection.
Digital Disposable-Style Cameras
Pros: No developing cost, instant review, higher shot count per unit (typically 100-500 shots).
Cons: Requires collecting and downloading from multiple devices, loses the analog aesthetic, battery life concerns, higher upfront cost ( each).
Complement: These make sense for extremely large weddings or couples who specifically don't want the film look.
Photo-Sharing Apps
Pros: Everyone already has their phone, immediate sharing, no hardware to distribute or collect.
Cons: Loses the distinctive film aesthetic, phone photos blend together, requires guests to download and set up an app, phones are already everywhere at weddings.
Complement: Apps capture the documentary volume while disposables add analog character.
Frequently Asked Questions
Are wedding disposable cameras still worth it in 2026?
Yes, with realistic expectations. The value isn't in technical image quality—it's in capturing perspectives and moments that only guests can provide. A handful of genuinely special candid frames justify the investment for most couples. Expect imperfection and you'll be delighted by the gems.
How much does it cost to develop wedding disposable cameras?
Professional developing and scanning typically runs per camera depending on scan resolution and service options. For a wedding with 40 cameras, budget approximately for professional processing. This seems significant, but consider that you invested thousands in professional photography—guest perspectives deserve proper developing too.
Can I develop disposable cameras at CVS or Walgreens?
Technically yes, most drugstores still process C-41 film including disposables at . However, the automated processing produces inconsistent results, especially with the challenging exposures typical of wedding receptions. For important photos, professional labs justify the modest price difference.
Should I use disposable cameras if I have a professional photographer?
Absolutely. Professional photographers capture the planned moments brilliantly, but they can only be in one place at a time. Your guests are everywhere, catching candid moments the photographer couldn't access. The perspectives complement each other.
What if some cameras don't get returned?
Expect some loss—typically 10-20% even with diligent collection. Even with active collecting, a few cameras typically disappear. This is normal. The cameras that return usually contain the most engaged guests' photos anyway. Build a small buffer into your camera count to account for losses.
Can you develop damaged or wet disposable cameras?
Often, yes. Water-damaged cameras and partially crushed cameras frequently yield salvageable images. The film inside is more resilient than you might expect. If in doubt, send the camera anyway—we've recovered images from surprisingly damaged units.
How should I label or decorate the cameras?
Simple is better. A small sticker with your names and wedding date adds personalization without interfering with camera function. Avoid decorations that block the flash, lens, or viewfinder. Ribbon wrapped around the body works; stickers across the lens do not.
Ready to Develop Your Wedding Cameras?
Whether you're planning ahead or just returned from your honeymoon with a basket full of disposables, we're here to help. Visit our film developing and scanning page for service details, or learn about our convenient mail-in film lab option for couples anywhere in the US.
At Kubus Photo Service, we've been developing wedding disposables since 1994. Your guests captured something special. With proper developing, you'll get to see what they saw—the candid, imperfect, irreplaceable moments that only analog film and genuine affection can produce.
Related Articles
Can You Develop Old Disposable Cameras? A Complete Guide to Aged Film
Yes, you can develop old disposable cameras, even decades-old ones. This guide covers what to realistically expect from aged film, how storage affects results, and tips for recovering the best possible images from that camera you found in a drawer.
Best Film Stocks for Wedding Photography: A Working Professional's Guide
Professional wedding photographers share the film stocks that deliver consistent results from the ceremony to the reception, plus practical advice on exposure, backup strategies, and working with labs under deadline pressure.
How Much Does Film Developing Cost in 2026? Complete Price Guide
Film developing costs $12-25 per roll in 2026. Get the complete breakdown of drugstore vs. professional lab pricing for 35mm, 120, disposable cameras, and black and white film with honest advice on where to spend and where to save.
Ready to Develop Your Film?
We're a family-run film lab in Greenpoint, Brooklyn, developing film since 1994. Whether you drop off in store or mail your rolls from anywhere in the US, we treat every frame with care.
How to Mail In Film for Developing: Complete Step-by-Step Guide
Learn exactly how to safely mail your film for professional developing. Step-by-step guide covering packing, shipping options, what to expect, and how to get the best results from a professional film lab.
Read the Complete Guide