The Complete Film Photography Workflow: From Purchase to Print
Quick Summary
The film photography workflow proceeds through distinct phases: purchasing and storing film properly (refrigerate at 35-40°F for months, freeze for years), loading and metering correctly (expose for shadows with negative film), shooting intentionally (each frame costs .75-1.00), choosing developing options (professional labs ensure consistency), reviewing and selecting from scans, making targeted edits that preserve film character, organizing a sustainable archive with the 3-2-1 backup rule, and printing favorites for display. In our experience at Kubus Photo Service, photographers who master each phase produce consistently excellent results.
- Store film in refrigerator (35-40°F) for months, freezer for years; let warm 1-2 hours before opening
- Meter for shadows in negative film to preserve detail; bracket unfamiliar situations
- Each frame costs .75-1.00 including film and processing—shoot intentionally
- Professional developing ensures consistency; communicate push/pull instructions clearly
- Edit minimally to preserve film character; archive with consistent naming and 3-2-1 backups
- 35mm prints well up to 11x14; medium format supports 16x20 and larger
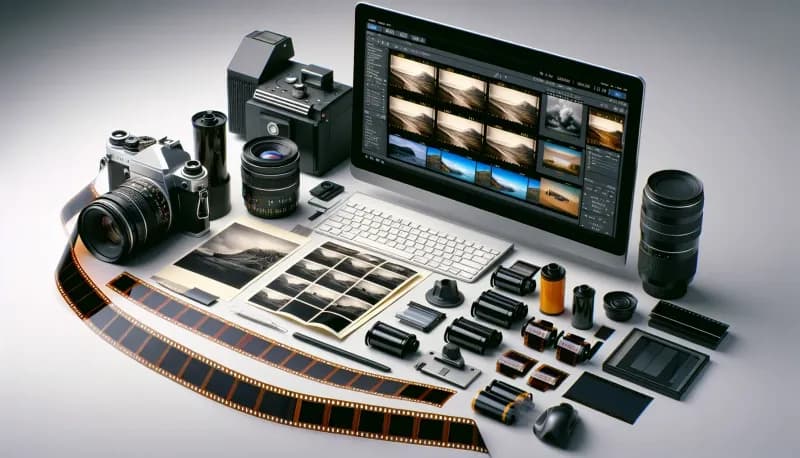
Film photography involves a sequence of deliberate steps from purchase to print, and mastering each phase—buying, storing, loading, metering, shooting, developing, scanning, editing, archiving, and printing—is what separates photographers who get consistently excellent results from those who struggle with unpredictable outcomes. Unlike digital capture where the camera handles everything through processing in milliseconds, film requires your involvement across hours, days, or weeks. This extended workflow is precisely what many photographers love about the medium. It demands attention, rewards intention, and produces photographs that carry the evidence of that care.
At Kubus Photo Service, we've guided photographers through this workflow since 1994. Over the years, we've seen what works and what doesn't. This guide walks through every stage of the film photography workflow, providing specific guidance that transforms abstract concepts into practical action.
Workflow Phase Overview
Before diving into details, here's the complete workflow at a glance:
Phase 1: Acquiring Film (5-10 min) — Key decision: which stock for your needs. Common mistake: buying expired film from poor storage.
Phase 2: Storing Film (ongoing) — Key decision: refrigerator vs freezer. Common mistake: opening cold film without warming.
Phase 3: Loading Camera (2-5 min) — Key decision: confirming proper engagement. Common mistake: not watching rewind knob turn.
Phase 4: Metering (per shot) — Key decision: where to meter. Common mistake: trusting camera in difficult light.
Phase 5: Shooting (variable) — Key decision: when to press shutter. Common mistake: spray-and-pray mentality.
Phase 6: Developing (4-6 days) — Key decision: lab vs home. Common mistake: not communicating push/pull instructions.
Phase 7: Scanning (with developing) — Key decision: resolution choice. Common mistake: always choosing maximum resolution.
Phase 8: Editing (30-60 min/roll) — Key decision: how much to adjust. Common mistake: over-processing film scans.
Phase 9: Archiving (15-30 min/roll) — Key decision: organization system. Common mistake: no backup strategy.
Phase 10: Printing (per image) — Key decision: size and medium. Common mistake: printing from low-res scans.
Phase One: Acquiring Film
Choosing Film Stock
Film selection happens before you even pick up your camera. Your choice determines color rendition, contrast, grain structure, and the overall character of your photographs. What film stock is right for you?
Color Negative (C-41 Process)
Color negative film offers the most latitude for exposure error and handles mixed lighting well. Popular choices include:
- Kodak Portra 160/400/800: The professional standard for portraits and weddings. Portra renders skin tones naturally with subtle warmth, handles overexposure gracefully, and maintains fine grain for the speed.
- Kodak Gold 200: Consumer stock with more saturation than Portra. Warmer tones, visible grain, nostalgic character. Excellent for outdoor shooting and travel.
- Kodak Ultramax 400: Versatile consumer film with good saturation. More affordable than Portra with slightly more grain.
- Kodak Ektar 100: Ultra-fine grain, high saturation, slightly cool rendering. The sharpest color negative film currently available. Demands accurate exposure.
- CineStill 800T: Tungsten-balanced motion picture stock with distinctive halation around highlights. Popular for night photography and artificial light.
Black and White (Traditional or C-41)
- Ilford HP5+ 400: Classic grain structure, extreme latitude for push/pull processing, affordable, versatile. The workhorse of black and white photography.
- Kodak Tri-X 400: Similar versatility to HP5+ with slightly different tonal rendering. Iconic stock used by generations of photojournalists.
- Ilford Delta 100/400/3200: T-grain emulsion producing finer grain than traditional stocks.
- Ilford XP2 Super: Black and white film processed in C-41 chemistry. Convenient for processing anywhere.
Slide Film (E-6 Process)
- Fuji Provia 100F: Fine grain, neutral color, professional quality. The last widely available slide film.
- Kodak Ektachrome E100: Revived film stock with slight warmth and beautiful saturation. Requires precise exposure—no latitude for error.
Where to Buy Film
- Camera stores (B&H Photo, Adorama, local shops): Fresh stock, proper storage, reliable dating
- Online retailers: Can work but storage conditions are unknown—buy from dedicated photo suppliers when possible
- Direct from manufacturer: Ilford and occasionally others sell direct with guaranteed freshness
- Used/expired film: Can produce excellent results or complete failures—expect color shifts and increased grain
Checking Film Dates
Film boxes display expiration dates indicating when optimal performance ends. Fresh film is ideal, but properly stored film remains usable years past expiration.
- Color negative: Use within 2-3 years past expiration if refrigerated
- Black and white: More tolerant of age—properly stored traditional black and white performs well 5-10 years past expiration
- Slide film: Most sensitive to age—use before expiration when possible
Phase Two: Film Storage
Proper storage dramatically extends film life. Heat and humidity accelerate degradation. Cold and dry preserve quality.
Refrigerator Storage (35-40°F)
For film you'll use within a few months, refrigerator storage works perfectly. Temperature around 35-40°F slows degradation significantly.
- Keep film in original sealed packaging until ready to use
- Allow film to warm to room temperature before opening (at least 1 hour)
- Opening cold film in warm humid air causes condensation that damages emulsion
Freezer Storage (0°F or below)
For long-term storage of bulk purchases or rare films, freeze at 0°F or below.
- Seal rolls in airtight bags (zip-lock or vacuum sealed) before freezing
- Allow 2-3 hours to warm before opening
- Frozen film can remain viable for 10+ years
Exposed Film Storage
After shooting, film degrades faster than unexposed stock. The latent image is chemically unstable.
- Process exposed film as soon as practical, ideally within 2-4 weeks
- Store exposed rolls in refrigerator if processing will be delayed
- Never freeze exposed film—ice crystal formation damages the latent image
- Never leave exposed film in hot cars (temperatures above 80°F cause rapid degradation)
Phase Three: Loading Your Camera
Loading film incorrectly is the most common cause of completely blank rolls. We've seen this countless times—don't let it happen to you.
35mm Loading
Most 35mm cameras follow similar loading procedures:
- Open camera back (usually via a latch on the left side or bottom)
- Insert film canister in the left chamber with protruding spool at bottom
- Pull film leader across to the take-up spool on right
- Engage film perforations with sprockets
- Thread leader under or into take-up spool (varies by camera)
- Advance film while watching to confirm sprockets engage properly
- Close back and advance until frame counter shows 1
The golden rule: Watch the rewind knob turn when advancing—this confirms film is moving. If the rewind knob doesn't turn, film may not be properly engaged. This single check prevents the most common first-roll disaster.
120 Medium Format Loading
Medium format film lacks a canister. The film is wound on a spool with paper backing.
- Open camera back and remove empty spool from take-up side
- Move empty spool to take-up position (usually right side or bottom)
- Insert new roll in feed position, ensuring paper winds in correct direction
- Thread paper leader into take-up spool slot
- Wind until "START" marking on paper aligns with camera's start indicator
- Close back and wind to first frame
Critical: Never open medium format backs in direct sunlight—paper backing doesn't fully protect from bright light.
Common Loading Failures
- Blank roll: Film never engaged sprockets—prevention: verify rewind knob turns during first advance
- Torn perforations: Too much tension or forcing the advance—prevention: gentle, steady advance motion
- Light leaks during loading: Opening back in bright light—prevention: load in shade
- Double exposures: Accidentally reloading a shot roll—prevention: never rewind leader fully into canister
Mail-In Your Film From Anywhere
Ship your film to our Brooklyn lab and get professional scans delivered to your inbox. Free shipping on 4+ rolls.
Phase Four: Metering and Exposure
Understanding Exposure Philosophy
Digital photographers often meter for highlights because blown highlights lose data permanently. Film photographers traditionally meter for shadows because film handles overexposure well but loses shadow detail in underexposure.
The saying "expose for the shadows, develop for the highlights" captures this principle. Negative film's latitude means overexposure usually just produces denser negatives that scan fine, while underexposure produces thin negatives with no shadow information to recover.
Practical Metering Approaches
- Matrix/evaluative metering: Modern cameras evaluate the entire frame—works well for average scenes but struggles with high contrast
- Center-weighted metering: Prioritizes the frame center—good for portraits and centered subjects
- Spot metering: Measures 1-3% of frame—provides precise control but requires understanding of tonal placement
- Incident metering: External meter measuring light falling on subject—the most accurate method for consistent exposure
Exposure Compensation Guidelines
Backlit subjects: Add +1 to +2 stops. Expose for your subject, not the bright background behind them.
Bright snow or sand: Add +1 to +1.5 stops. Meters see all that brightness and recommend underexposure—compensate to keep snow white.
Dark subjects on dark backgrounds: Subtract -1 stop. Meters try to make everything middle gray, so dark scenes need less exposure.
Portra skin tones: Add +0.5 to +1 stop. Slight overexposure produces luminous, flattering skin tones that Portra handles beautifully.
Bracketing
When uncertain, bracket exposures by shooting the same composition at multiple settings.
- For important shots: meter reading, +1 stop, -1 stop
- For difficult conditions: -1, 0, +1, +2
Bracketing uses additional frames but ensures you capture something usable. With experience, you'll bracket less as your exposure intuition develops.
Phase Five: Shooting Intentionally
The Cost of Each Frame
Film costs money. A 36-exposure roll of Portra 400 costs . Professional developing and scanning adds . Each frame costs approximately .75-1.00.
This cost encourages intentionality. You can't spray-and-pray and sort later. You must consider each composition, each exposure, each moment before pressing the shutter.
In our experience, many photographers find this constraint improves their work. Slowing down means seeing more clearly, composing more carefully, and releasing the shutter only when everything aligns.
Taking Notes
A shooting log helps you learn from results. Note:
- Roll number and film type
- Date and location
- Camera and lens used
- Frame numbers with exposure settings
- Lighting conditions
- Any adjustments or experiments
When scans return, match them to your notes. What worked? What didn't? Specific information about your settings helps you understand why.
Handling Challenging Situations
- Indoor natural light: Slow shutter speeds or wide apertures—consider tripod or bracing against walls
- Harsh midday sun: High contrast challenges film—consider fill flash or seeking shade
- Golden hour magic: The most forgiving light—standard metering usually works
- Night photography: Tripod essential—long exposure requires reciprocity compensation
Phase Six: Developing Options
Professional Lab Developing
Professional labs provide consistency, convenience, and expertise. Equipment like Noritsu and Fuji Frontier processors maintain temperature (within ±0.5°F), agitation, and timing to specifications you cannot match at home.
Advantages:
- Consistent results across many rolls
- No chemical storage or disposal concerns
- Professional scanning on calibrated equipment
- Expertise diagnosing problems and suggesting improvements
Choosing a lab: Look for labs that specialize in film rather than offering it as an afterthought. Ask about their equipment, turnaround times, and whether they offer communication about unusual situations.
At Kubus Photo Service, we develop on professional Noritsu equipment with 4-6 business day turnaround depending on volume. Rush same-day and next-day service is available when you need results faster. Visit our film developing and scanning services to learn more.
Home Developing
Home developing offers control, satisfaction, and eventually cost savings.
- Black and white: Most accessible for home developing—simple chemistry, room temperature processing, tolerant of variation
- C-41 color negative: Possible at home with kits—temperature control is critical at 102°F ±0.5°F
- E-6 slide: Very challenging at home—multiple baths with precise timing—most photographers send slide film to professional labs
Consider cost carefully: Home developing saves money only at volume. Equipment and chemistry investment () takes 20-30 rolls to recoup. If you shoot infrequently, professional labs make more economic sense.
Push and Pull Processing
Film can be deliberately under or overexposed and then compensated in development.
- Pushing (underexposing and extending development): Increases effective speed at cost of contrast and grain. Shooting ISO 400 film at ISO 1600 then push processing 2 stops produces usable results in low light.
- Pulling (overexposing and reducing development): Decreases contrast and may improve highlight detail.
When submitting film for push or pull processing, clearly mark each roll with the intended processing: "Push +1" or "Pull -1."
Phase Seven: Scanning and Digitization
Scan Resolution Basics
Scan resolution determines file size and maximum output size.
35mm at 3600 DPI yields approximately 17 megapixels—sufficient for prints up to 11x14 and covers most practical uses.
35mm at 4800 DPI yields approximately 30 megapixels—best for archival purposes, large prints at 16x20 or larger, and images you'll crop extensively.
120 at 2400 DPI yields approximately 23 megapixels for 6x7 format—standard quality that covers most uses.
120 at 3200 DPI yields maximum practical resolution—best for archival purposes and large exhibition prints.
Lab Scanning Options
Most labs offer tiered scanning:
- Standard resolution (2400-3000 DPI): Good for web sharing, social media, and prints up to 8x10
- High resolution (4000+ DPI): Better for archiving, large prints, and extensive cropping
- Premium/drum scanning: The highest quality available—essential for exhibition prints or commercial work
For most photographers, standard lab scans suffice for initial review and sharing. High-resolution scans of favorites provide archival-quality files.
Working with Your Lab on Scans
Communicating with your lab improves results. Let them know:
- Your intended output (web, prints, archival)
- Color preferences (neutral, warm, as-shot)
- Crop preferences (full frame, with borders, auto-crop)
- Any unusual situations (intentional exposures, experiments)
Labs make interpretive decisions during scanning. A note saying "these are intentionally dark, don't brighten" prevents well-meaning corrections that ruin your vision.
Phase Eight: Editing and Post-Processing
The Philosophy of Minimal Editing
Film's appeal includes its inherent character: grain structure, color science, tonal response. Heavy editing can eliminate these qualities, producing images that look digital.
Many film photographers adopt a minimal editing philosophy:
- Correct obvious problems (dust, scratches)
- Adjust white balance if necessary
- Minor exposure tweaks if scans are slightly off
- Minimal contrast and saturation adjustment
This approach preserves what makes film photographs distinct. If you want extensive control over every parameter, shooting digital makes more sense.
Standard Editing Workflow
- Import and review: Load all scans, review at full size, mark obvious keepers and rejects
- Initial selection: Choose images worth further attention—most photographers keep 10-30% of frames from any roll
- Technical corrections: Remove dust spots (clone/heal tool), correct any color cast from scanning, adjust overall exposure if needed
- Creative adjustments: Minor curve adjustments for contrast, subtle color tweaking if the scan doesn't match your memory
- Export: Save edited files in a logical structure—keep original scans untouched
Software Options
- Adobe Lightroom (/month): Industry standard for workflow management and editing
- Capture One (/month or perpetual): Alternative RAW processor with excellent color tools
- Negative Lab Pro ( one-time): Lightroom plugin specifically for converting and editing film scans
Phase Nine: Organization and Archiving
File Naming Conventions
Consistent naming makes archives searchable years later.
Example structure: YYYYMMDD_FilmStock_RollNumber_Frame_Description
20260215_Portra400_R042_23_Brooklyn_Bridge_Sunset
Whatever system you choose, use it consistently. Your future self will thank you.
Folder Organization
Organize by date, project, or location. All systems work if applied consistently.
By date:
2026/
  02_February/
    2026-02-15_Brooklyn/
      Scans/
      Edits/
      Prints/
Include a subfolder for original scans that remain untouched. Edit copies, not originals.
Backup Strategy: The 3-2-1 Rule
Film negatives provide physical backup that digital files lack. But scans need digital backup.
3-2-1 rule: 3 copies of everything, on 2 different media types, with 1 copy offsite.
- Primary: Working drive
- Secondary: External backup drive
- Offsite: Cloud storage or drives stored elsewhere
Backup regularly. Automate if possible. Test restores periodically.
Physical Negative Storage
Negatives deserve archival storage. Proper sleeves protect against dust, scratches, and chemical degradation.
- Archival sleeves: PrintFile or similar acid-free sleeves—never use PVC sleeves (they emit chemicals that damage negatives)
- Storage boxes: Acid-free boxes in cool, dry, dark locations—avoid attics (heat), basements (humidity)
- Labeling: Mark sleeves with roll number, date, and basic content description
Phase Ten: Printing
Why Print?
Screens cannot replicate the experience of a physical print. Photographs exist most fully as prints: holdable, hangable, permanent.
Printing also reveals qualities hidden on screens. The texture of paper, the depth of a darkroom print, the presence of an object that took craft to create.
Printing Options
- Optical prints from negatives: Traditional darkroom printing—the purist approach producing prints of extraordinary quality
- C-prints from digital files: Digital file exposes photographic paper with lasers or LEDs—true photographic paper, not inkjet
- Inkjet prints from scans: Modern inkjet printers on archival papers produce excellent results—most accessible option
Print Size Guidelines
- 35mm film prints well up to 11x14 with professional scanning—16x20 shows visible grain
- 120 film prints well up to 16x20 or larger depending on specific format—6x7 supports prints up to 24x30 with excellent quality
These guidelines assume proper exposure, accurate focus, and professional scanning.
Display and Framing
Protect prints from direct sunlight, which fades all photographic materials over time. UV-filtering glass extends print life. Acid-free mats prevent chemical damage.
Building Sustainable Practice
Volume and Budget
Film photography costs add up. Sustainable practice means finding your comfortable volume.
- Cost per roll: film + developing and scanning =
- Shooting 4 rolls per month: /month
- Shooting 12 rolls per month: /month
Budget according to what you can sustain over years, not months. Occasional shooting with careful attention beats constant shooting that becomes financial stress.
Building Relationships
Film photography benefits from community. Labs, camera stores, and fellow photographers share knowledge that accelerates learning.
Find a lab you trust and communicate with. They'll remember your preferences, flag problems, and suggest improvements. The relationship becomes valuable over time.
Continuous Learning
Every roll teaches something. Review results critically. What worked? What didn't? What will you try next?
Take notes. Compare to previous work. Experiment deliberately rather than randomly. Each roll represents investment—extract maximum learning.
Your Workflow at Kubus Photo Service
When you're ready to develop and scan, our mail-in film lab accepts film from anywhere in the country. We develop all common film types on professional Noritsu equipment and deliver high-resolution scans directly to your inbox.
Our standard turnaround runs 4-6 business days depending on current volume. Rush same-day and next-day service is available when timing matters.
Learn more about our film developing and scanning services, or give us a call at (718) 389-1339 with questions about your workflow.
Frequently Asked Questions
How long does the entire workflow take?
From shooting to receiving scans, expect about one week using a mail-in lab. Shooting typically takes hours to days depending on project. Mail transit adds 2-3 days each direction. Lab turnaround adds 4-6 days. After receiving scans, editing and organization time varies with your thoroughness.
Can I skip any steps?
You can simplify but not truly skip. You must have film to shoot, must develop somehow, must digitize or print to see results. Within each phase, you can choose simpler options (auto metering instead of manual, standard scans instead of premium) without eliminating the phase.
How do I know if my workflow is working?
Consistent, satisfying results indicate a working workflow. If you regularly receive scans you're happy with, your process works. If problems recur (consistent underexposure, organizational chaos, forgotten rolls), examine that phase for improvement.
What's the most important phase to get right?
Exposure during shooting. No amount of scanning expertise or editing skill recovers badly underexposed negatives. In our experience, proper exposure provides the foundation everything else builds upon.
Should I develop at home or use a lab?
Labs make sense for most photographers. Consistent results, no chemical hassles, professional scanning. Home developing makes sense if you shoot high volume (15+ rolls/month), want maximum control, enjoy the process, and can maintain proper technique.
How do I preserve film's character when editing?
Minimal intervention. Correct technical problems (dust, color cast from scanning). Make small adjustments to bring the image closer to your memory of the scene. Resist the urge to heavily process. The reality is that if you wanted unlimited editing latitude, digital capture makes more sense.
Kubus Photo Service has been developing film in Greenpoint, Brooklyn since 1994. We're a family-run lab that cares about every phase of your film photography workflow. Questions about any aspect of the process? Call us at (718) 389-1339.
Related Articles
How to Mail In Film for Developing: Complete Step-by-Step Guide
Learn exactly how to safely mail your film for professional developing. Step-by-step guide covering packing, shipping options, what to expect, and how to get the best results from a professional film lab.
How Much Does Film Developing Cost in 2026? Complete Price Guide
Film developing costs $12-25 per roll in 2026. Get the complete breakdown of drugstore vs. professional lab pricing for 35mm, 120, disposable cameras, and black and white film with honest advice on where to spend and where to save.
How to Organize and Archive Film Scans: A System That Actually Works
Most photographers' film archives are disasters waiting to happen. After 30 years of watching people lose irreplaceable images, here's the organization and backup system that actually protects your work.
Ready to Develop Your Film?
We're a family-run film lab in Greenpoint, Brooklyn, developing film since 1994. Whether you drop off in store or mail your rolls from anywhere in the US, we treat every frame with care.
How to Mail In Film for Developing: Complete Step-by-Step Guide
Learn exactly how to safely mail your film for professional developing. Step-by-step guide covering packing, shipping options, what to expect, and how to get the best results from a professional film lab.
Read the Complete Guide